Installation Guide
Step-by-step instructions to get your Mission Bike Lights up and running.
If you have any questions, please don't hesitate to contact us!
Choose Your Kit
40" & 60" Pole Installation
Mount your Mission Bike Lights pole to your bike frame, bike rack, or kid's bike seat. The 40" and 60" poles come with 3 mounting solutions:
- Velcro straps: Easy to install and remove — perfect if you need to take the pole off when parking. Works great on bike racks and kid's seats. On bike frames, they may loosen over time and need occasional retightening.
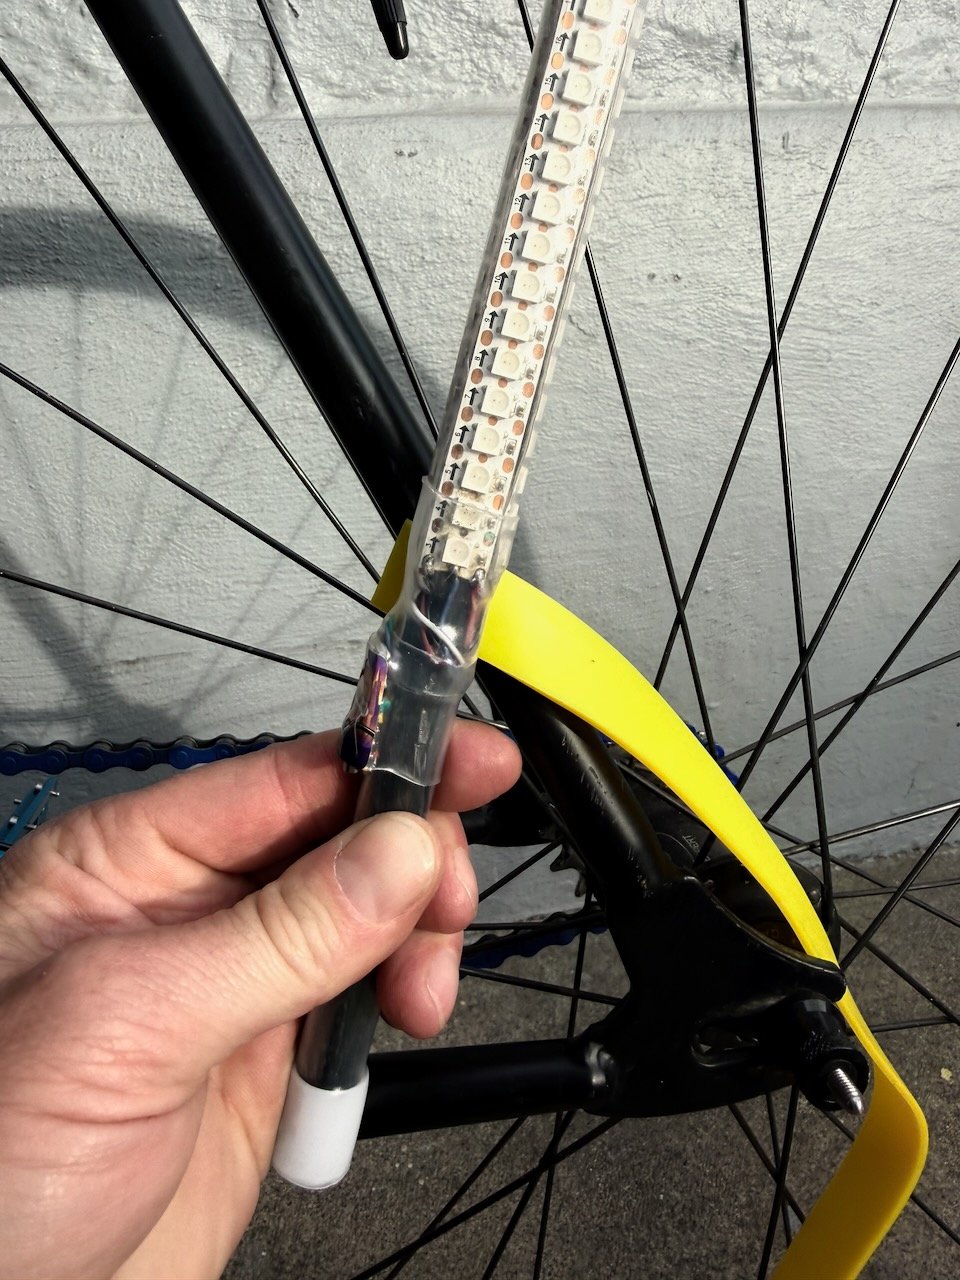
- Rubber straps: Slightly harder to install, but the most secure option for bumpy rides on the San Francisco streets!
- Zip ties: Easy and secure. Best for a permanent installation where you don't need to remove the pole.
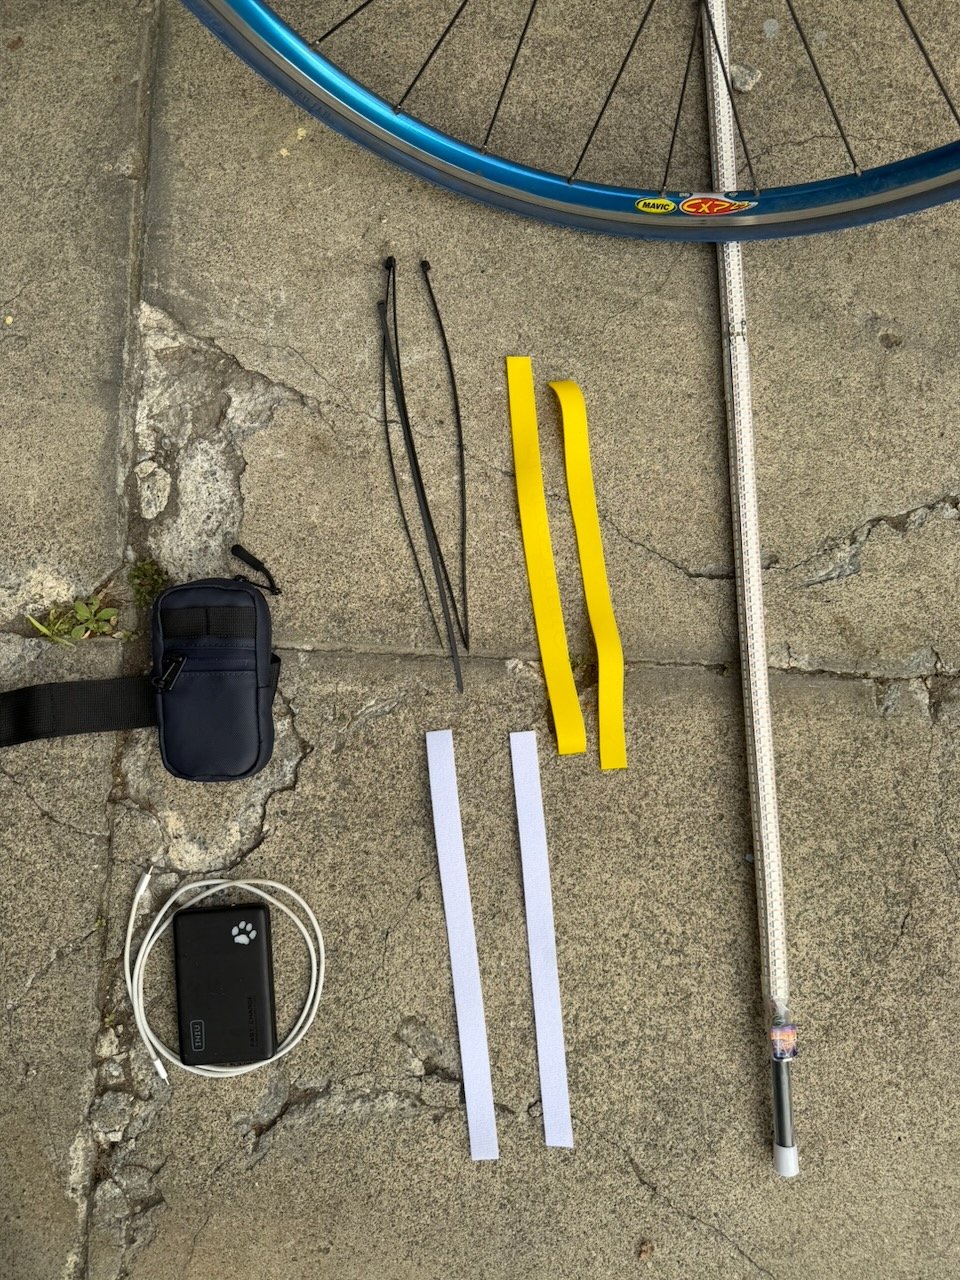
Mounting options and optional accessories: USB-C battery with cable, saddle bag
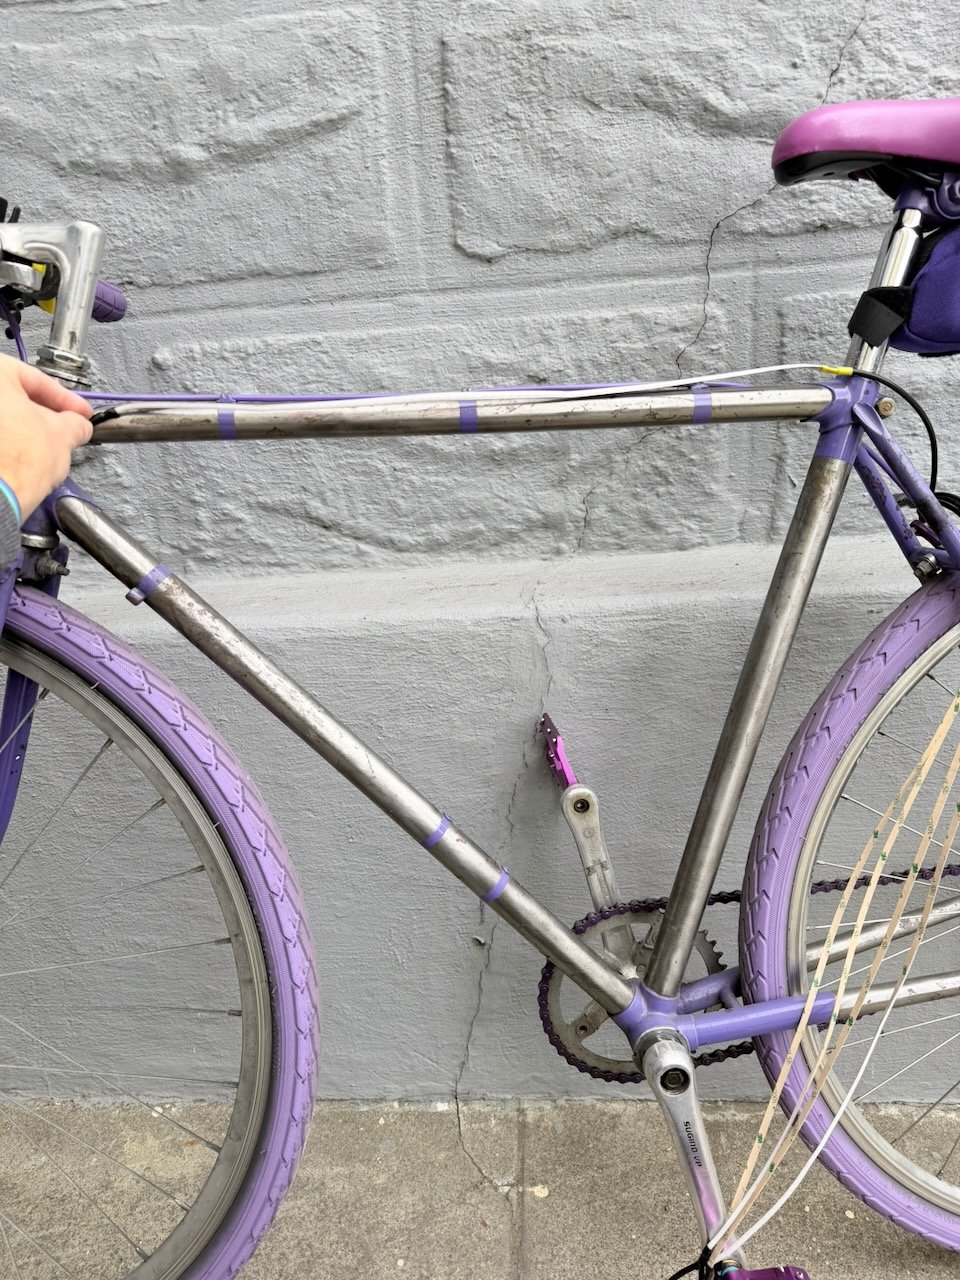
Frame Mounting
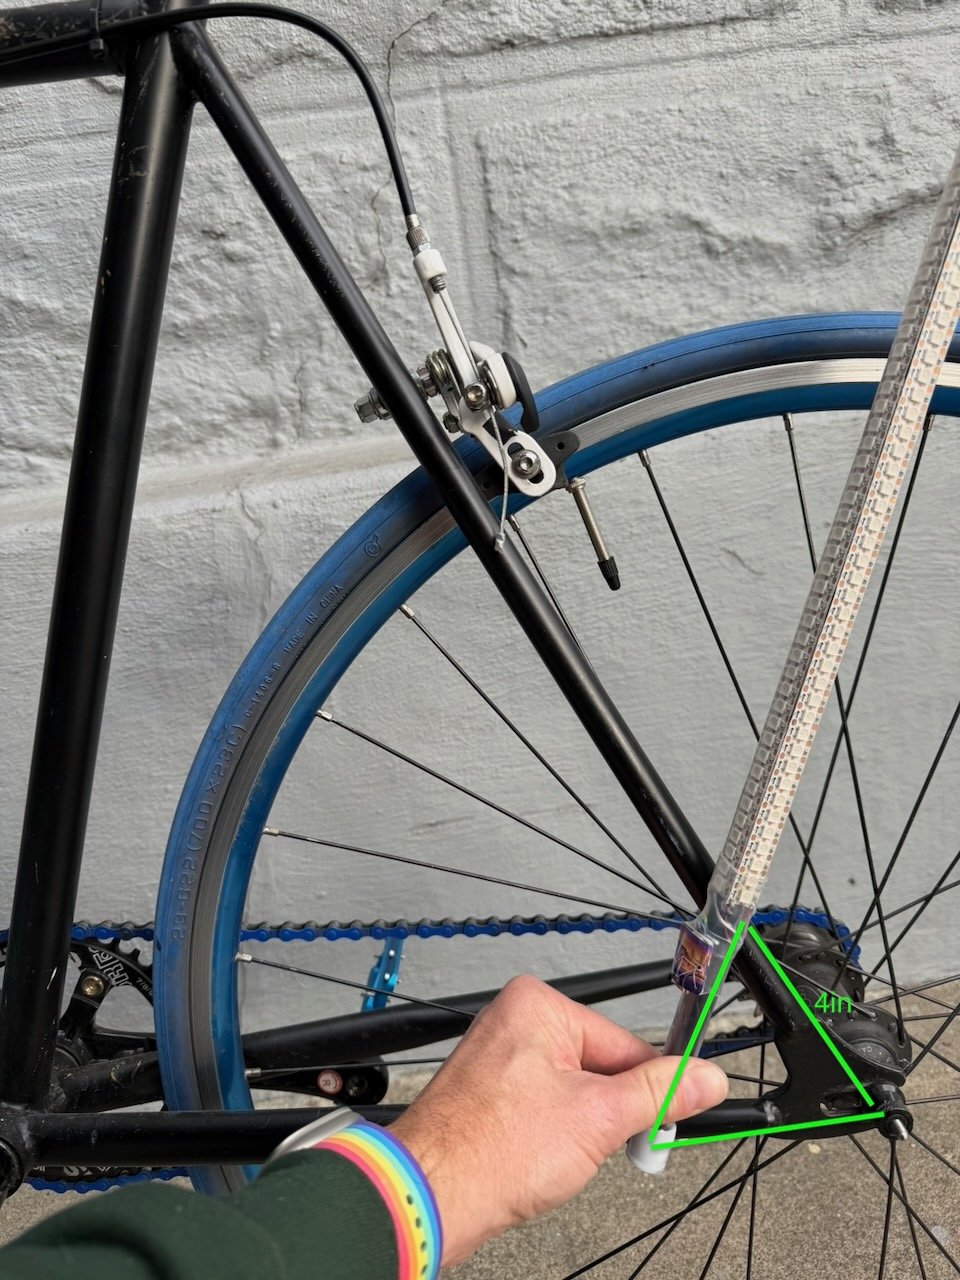
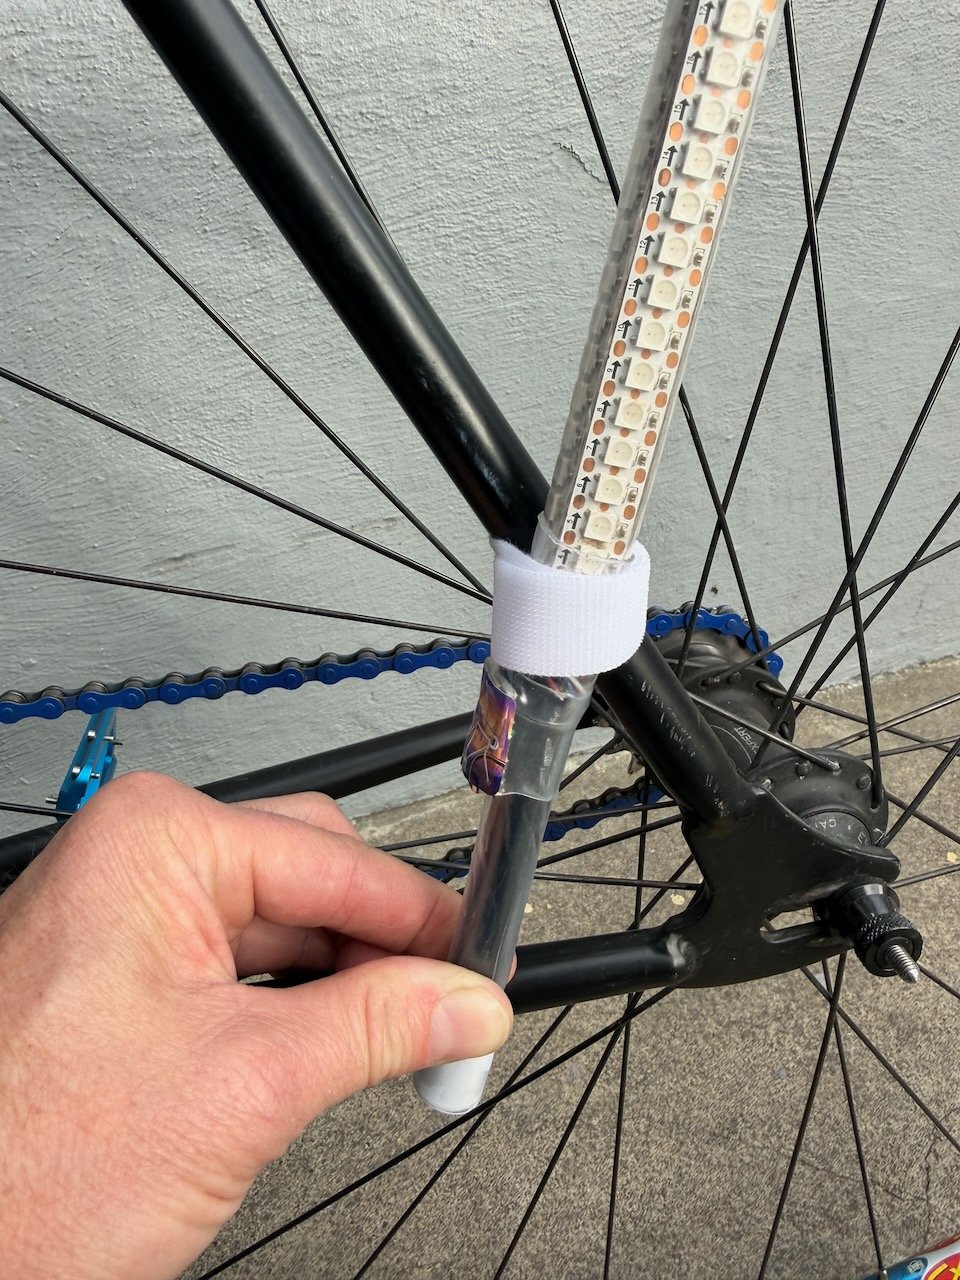
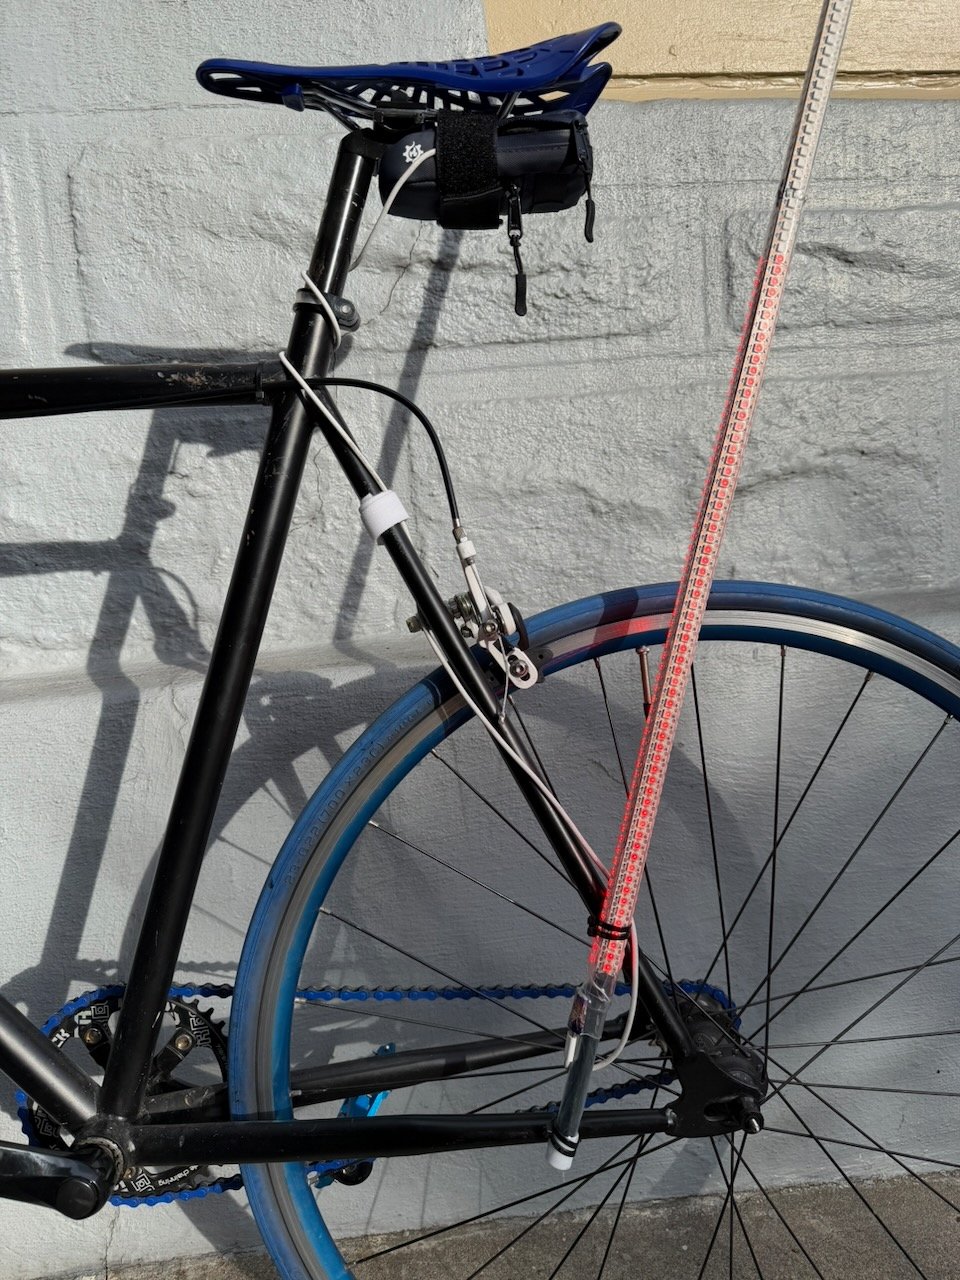
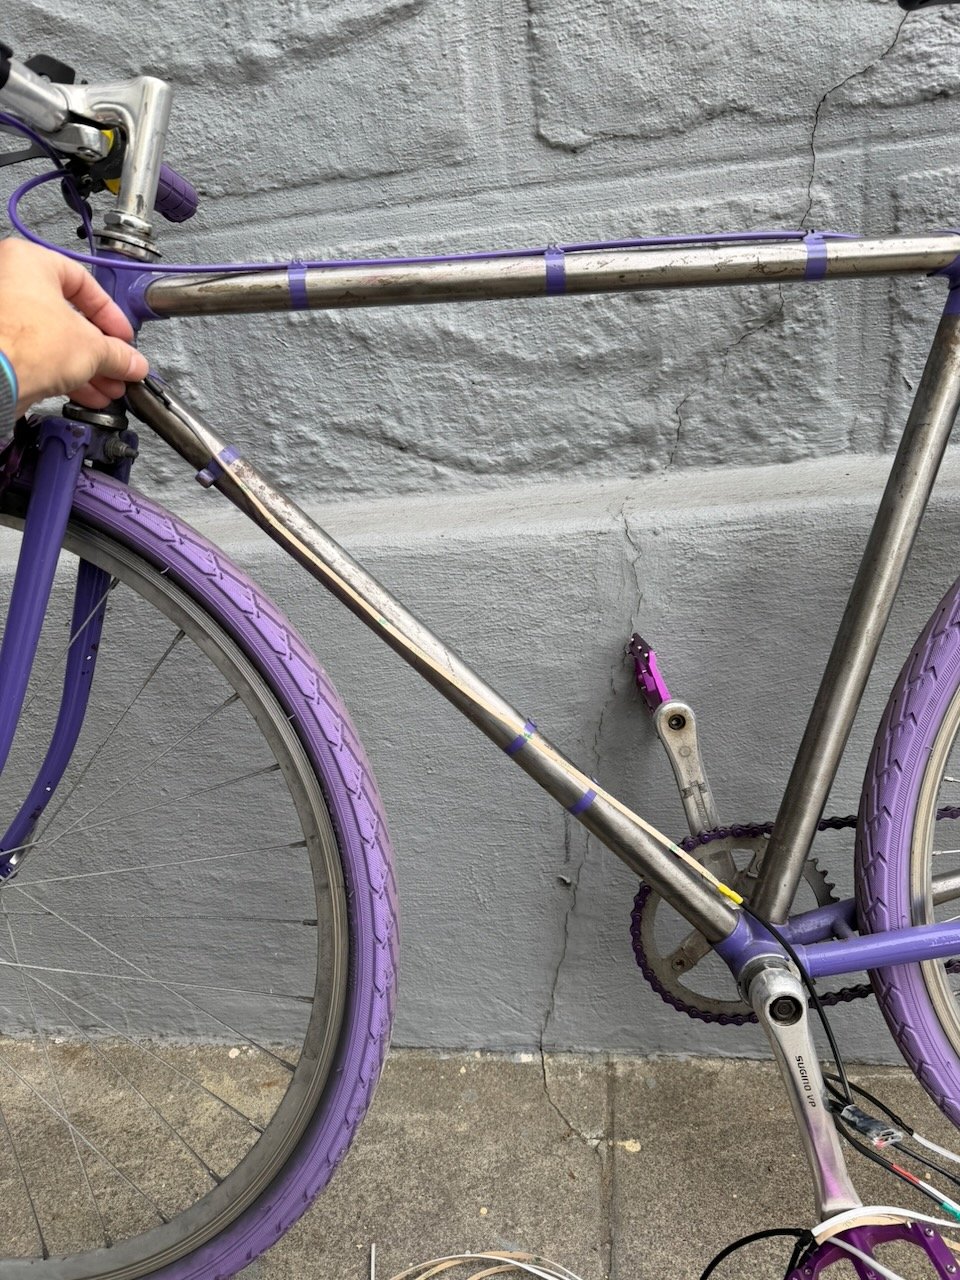
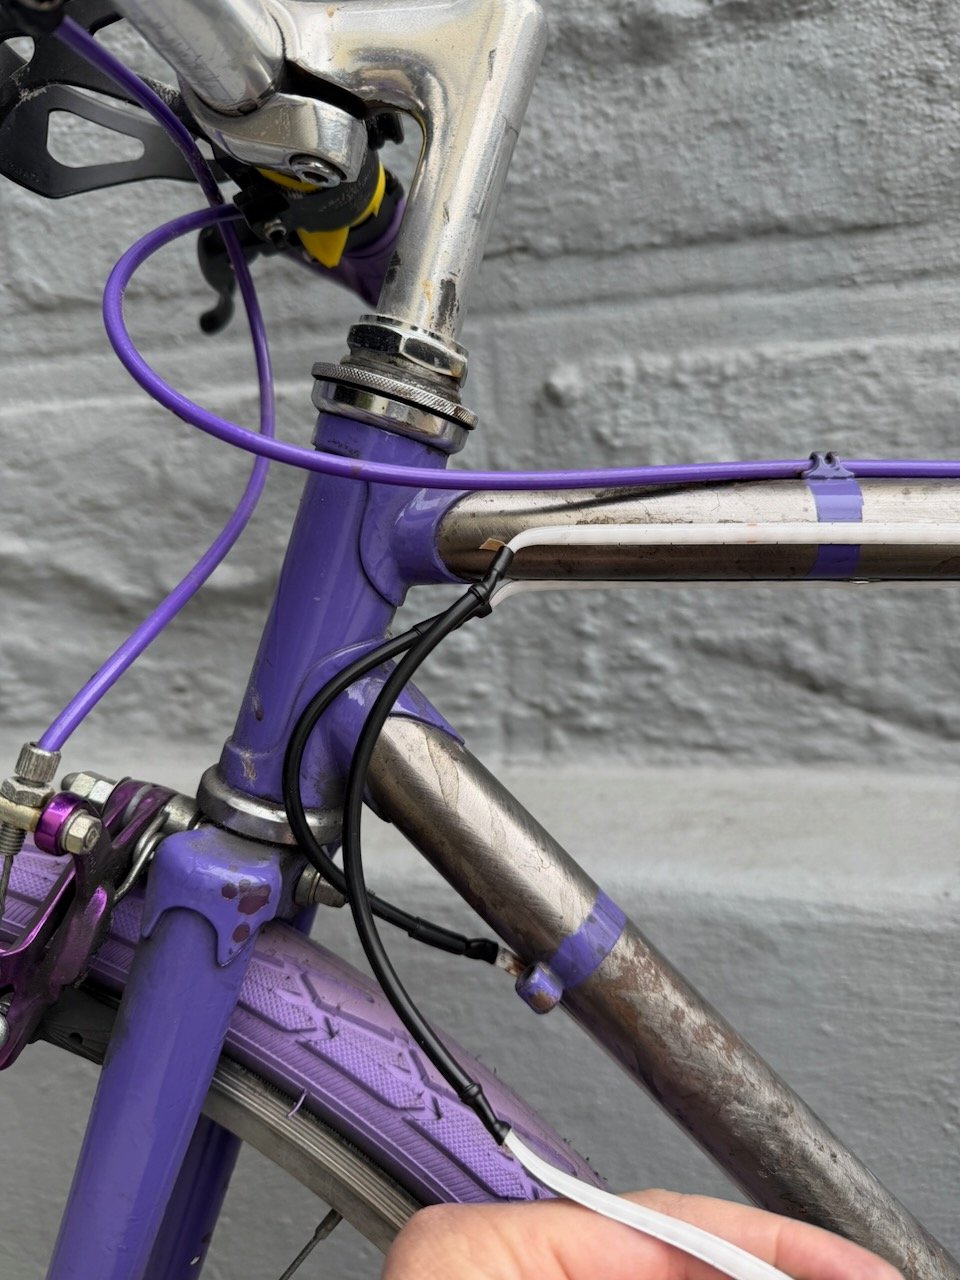
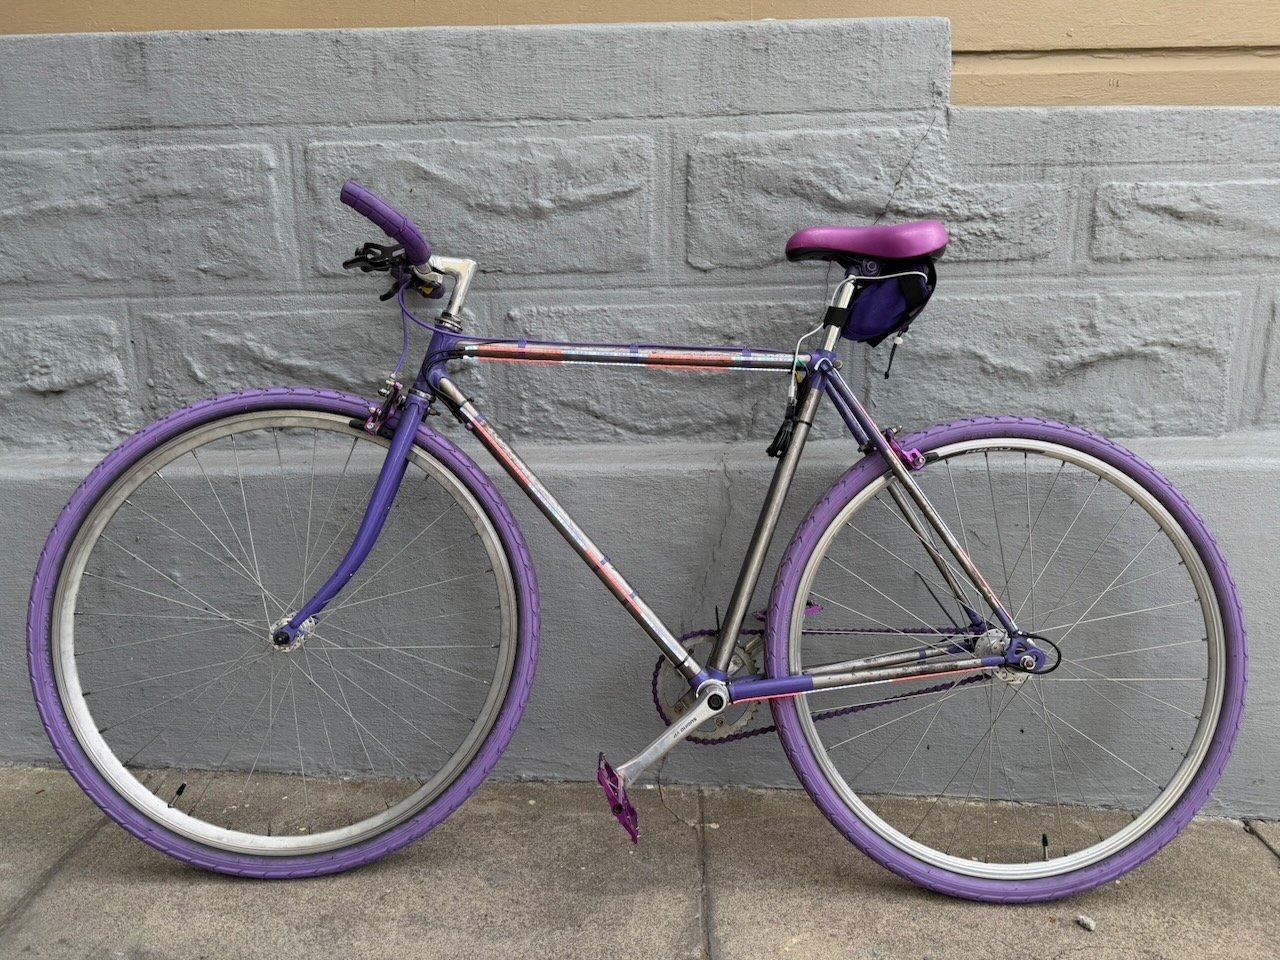
Place the pole on the left rear of your bike frame to assess the mounting position.
- Avoid mounting where the straps may interfere with brake or shifting cables.
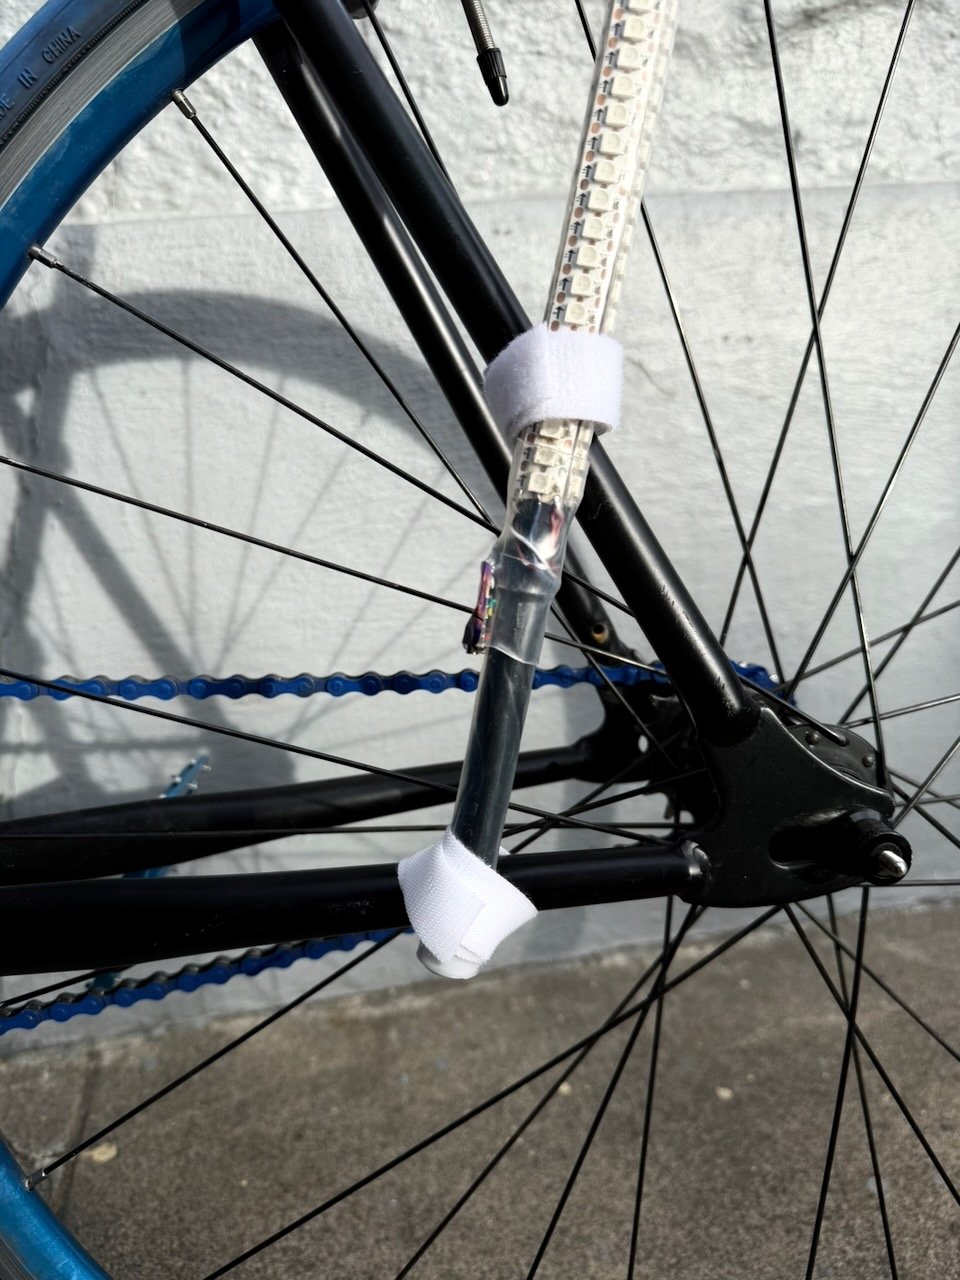
- Position the pole as far back as possible so it doesn't interfere with your pedaling. The pole only needs to extend past the bottom of the frame by about ¼".
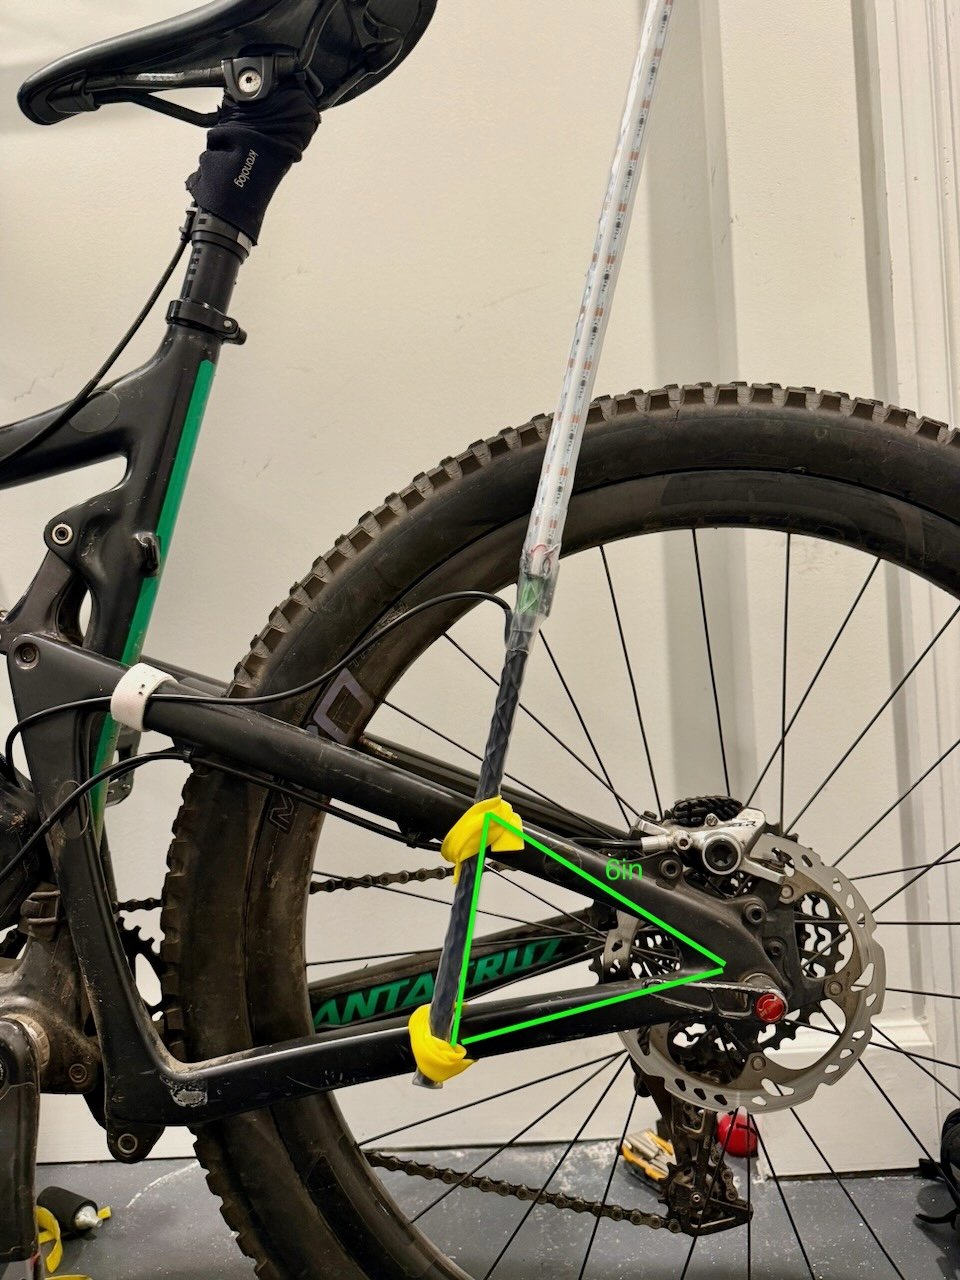
- The frame and pole should form a triangle with approximately 4" sides for 40" poles, and 6" sides for 60" poles.
- For best aesthetics, angle the pole to match the angle of your seat post.
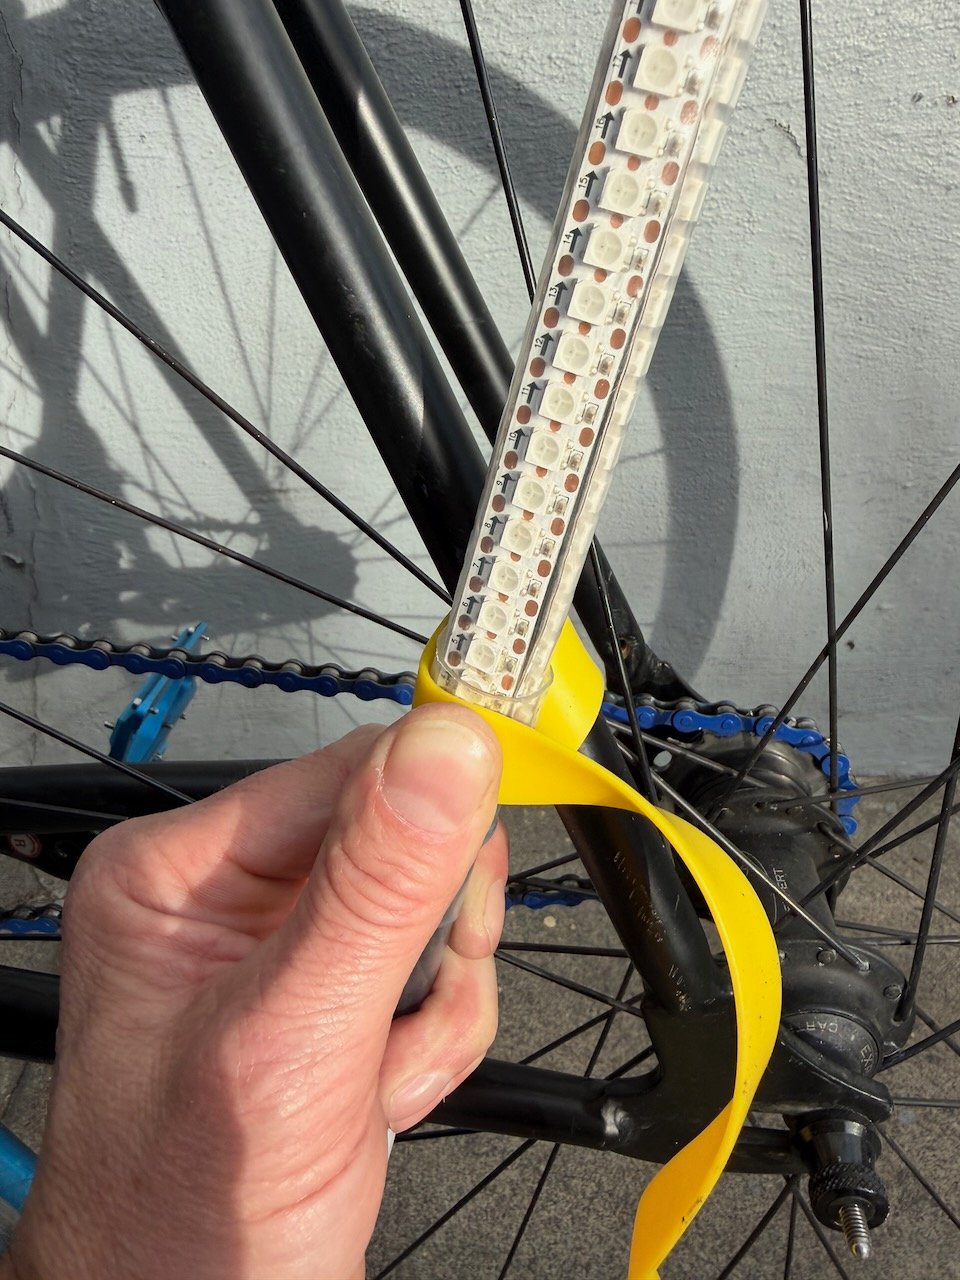
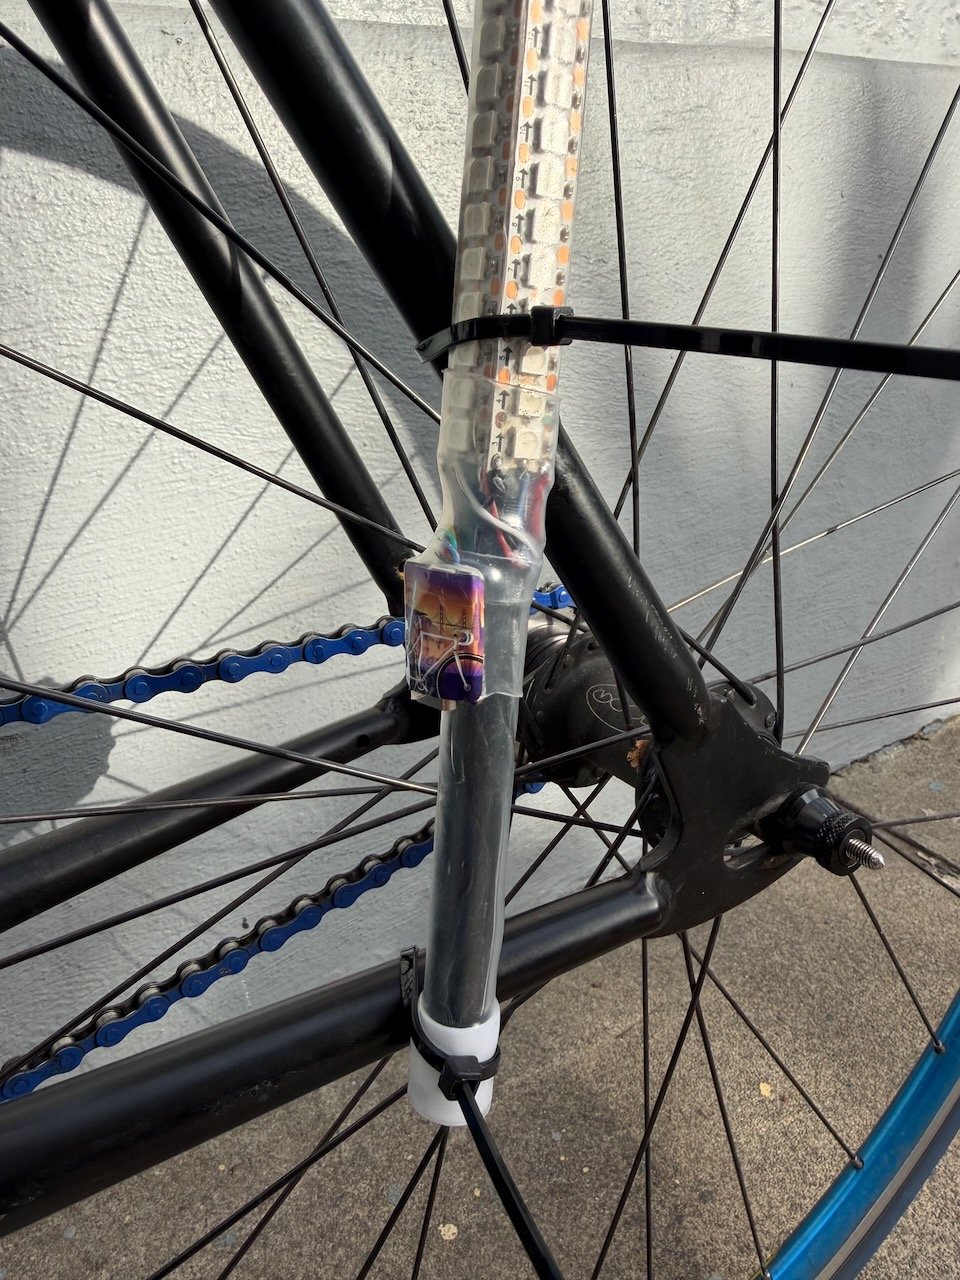
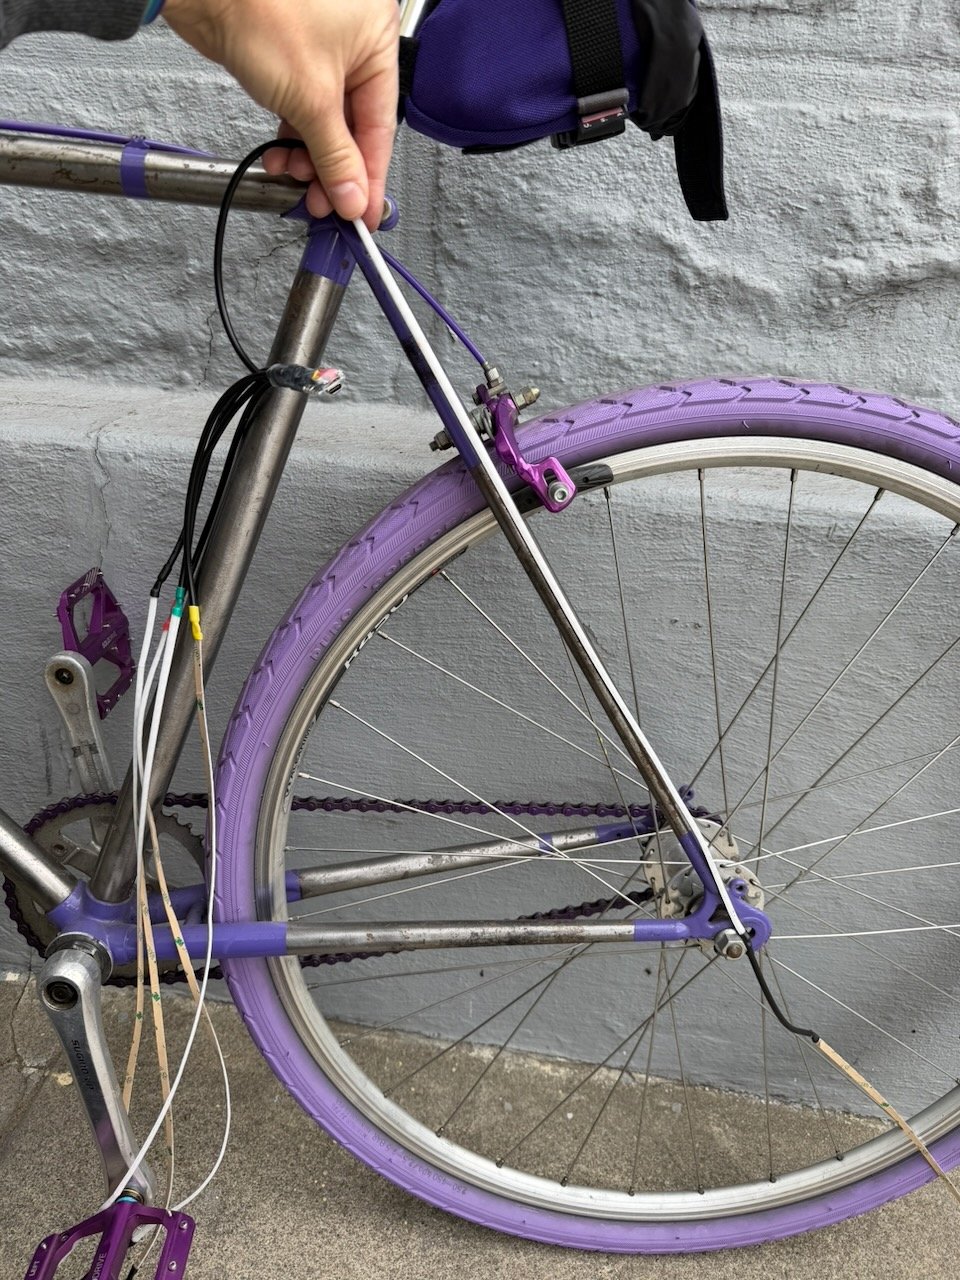
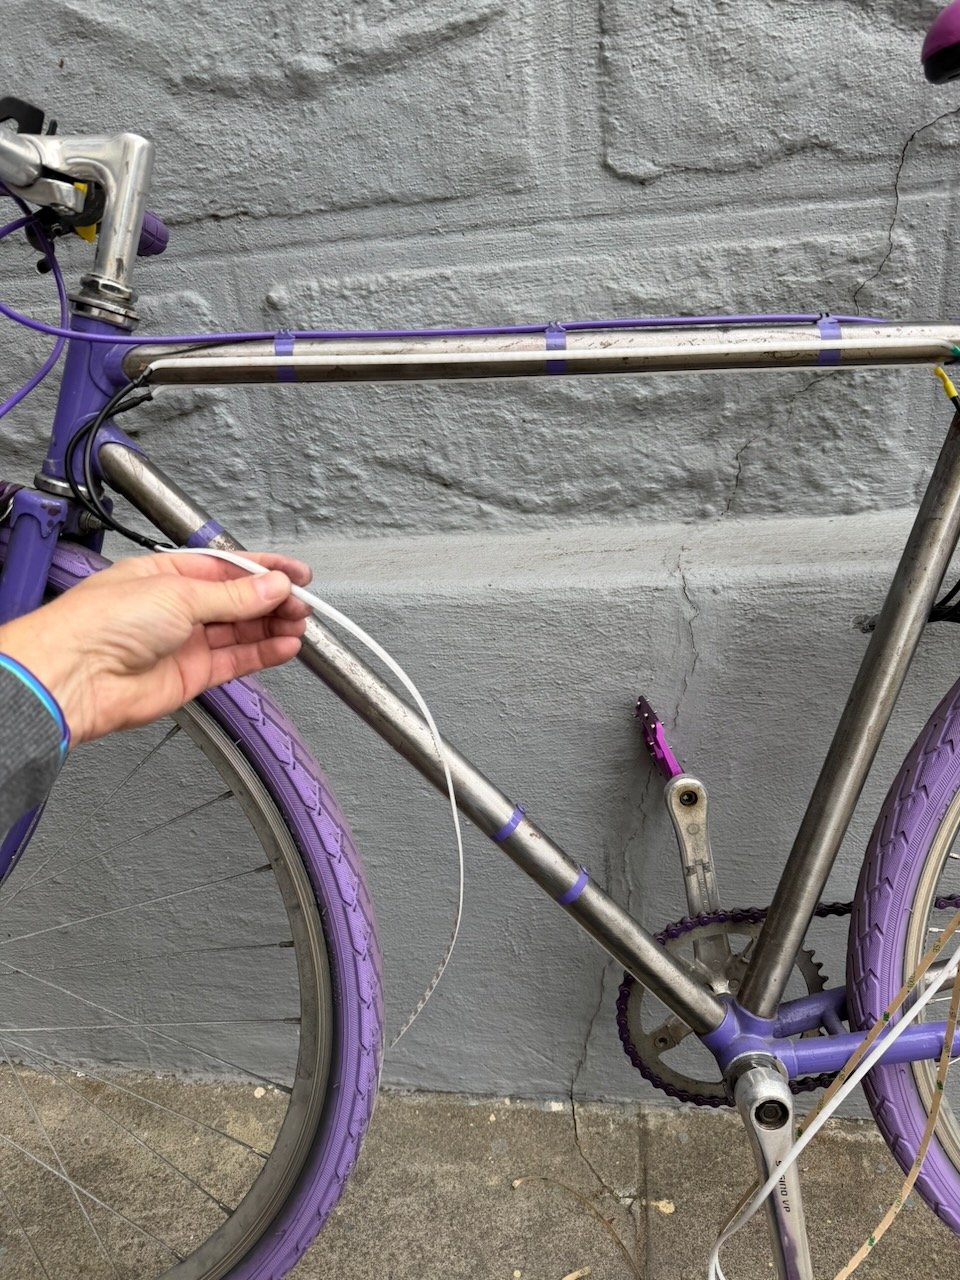
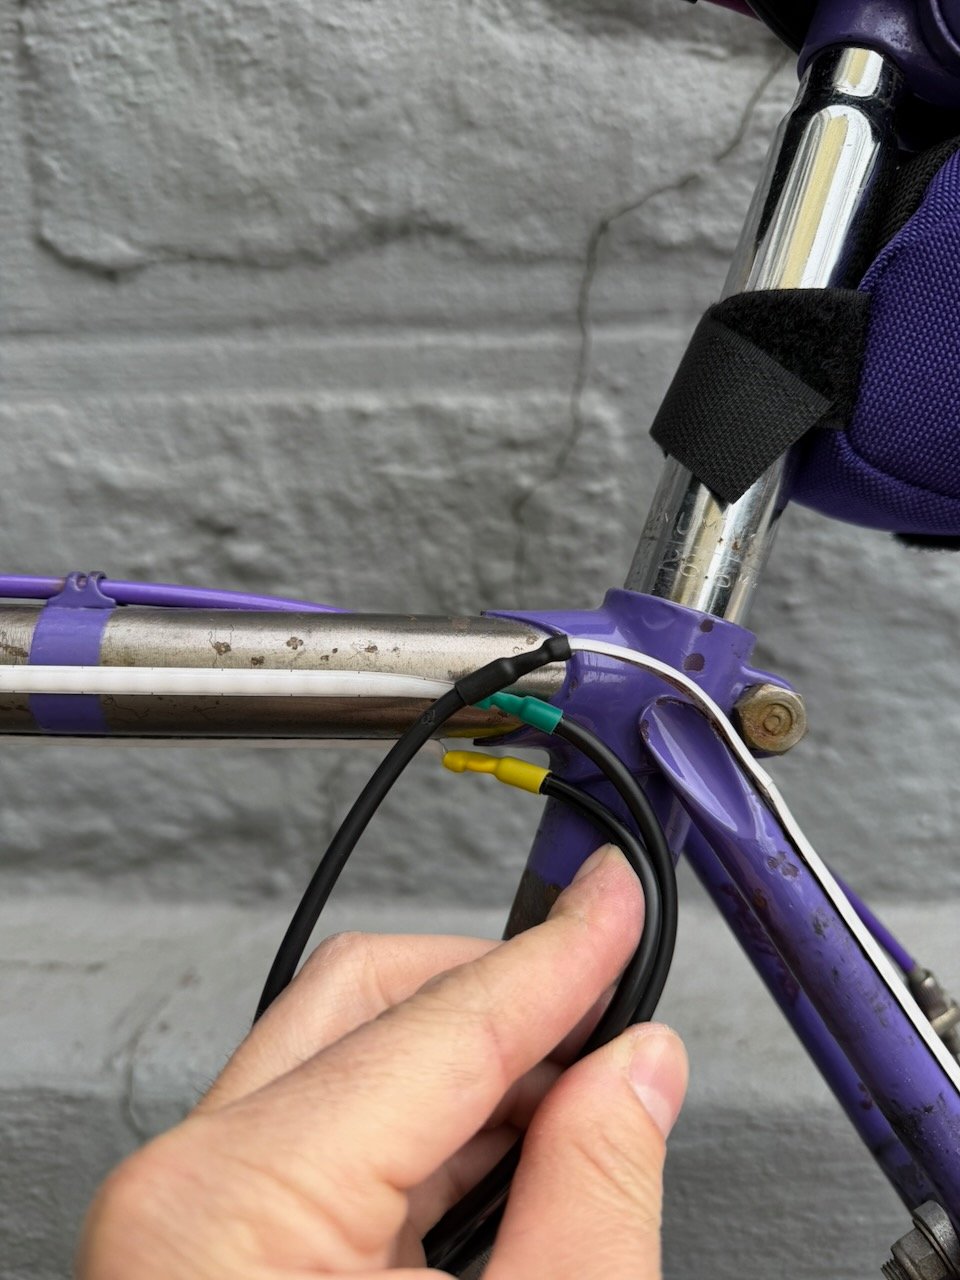
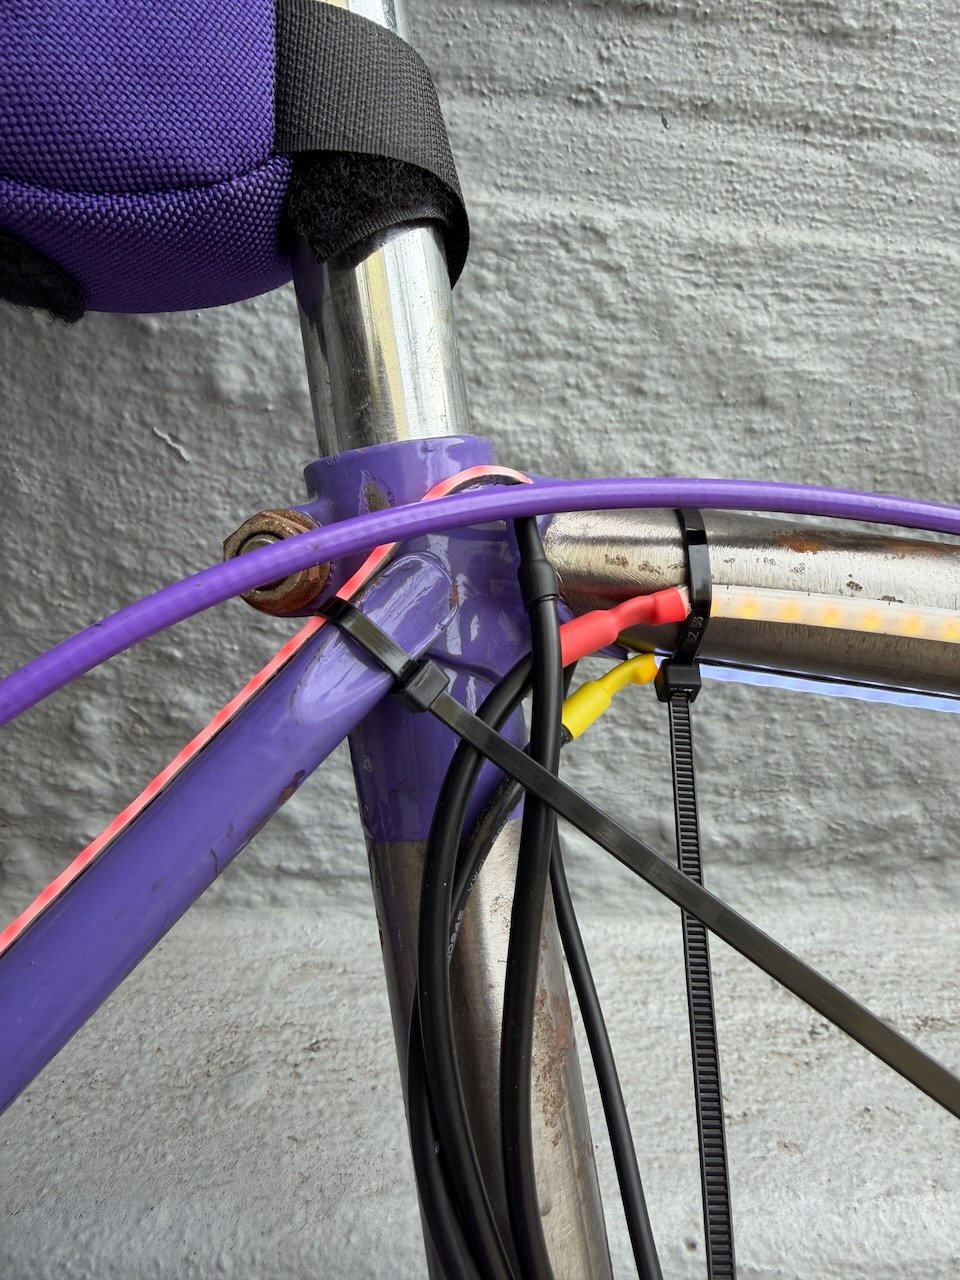
Start with the top point where the pole meets the frame. Wrap the strap tightly around the pole and frame.
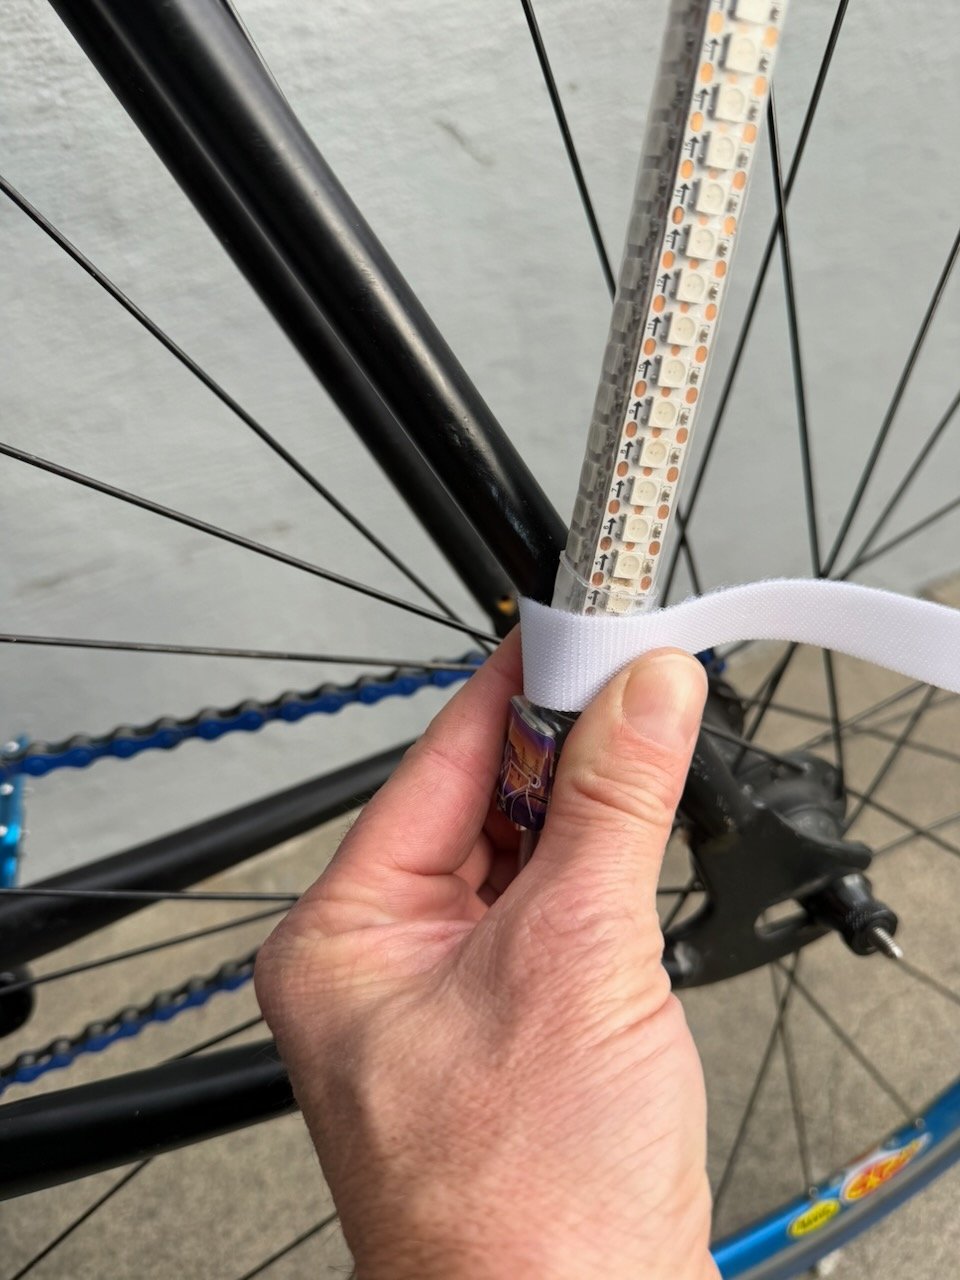
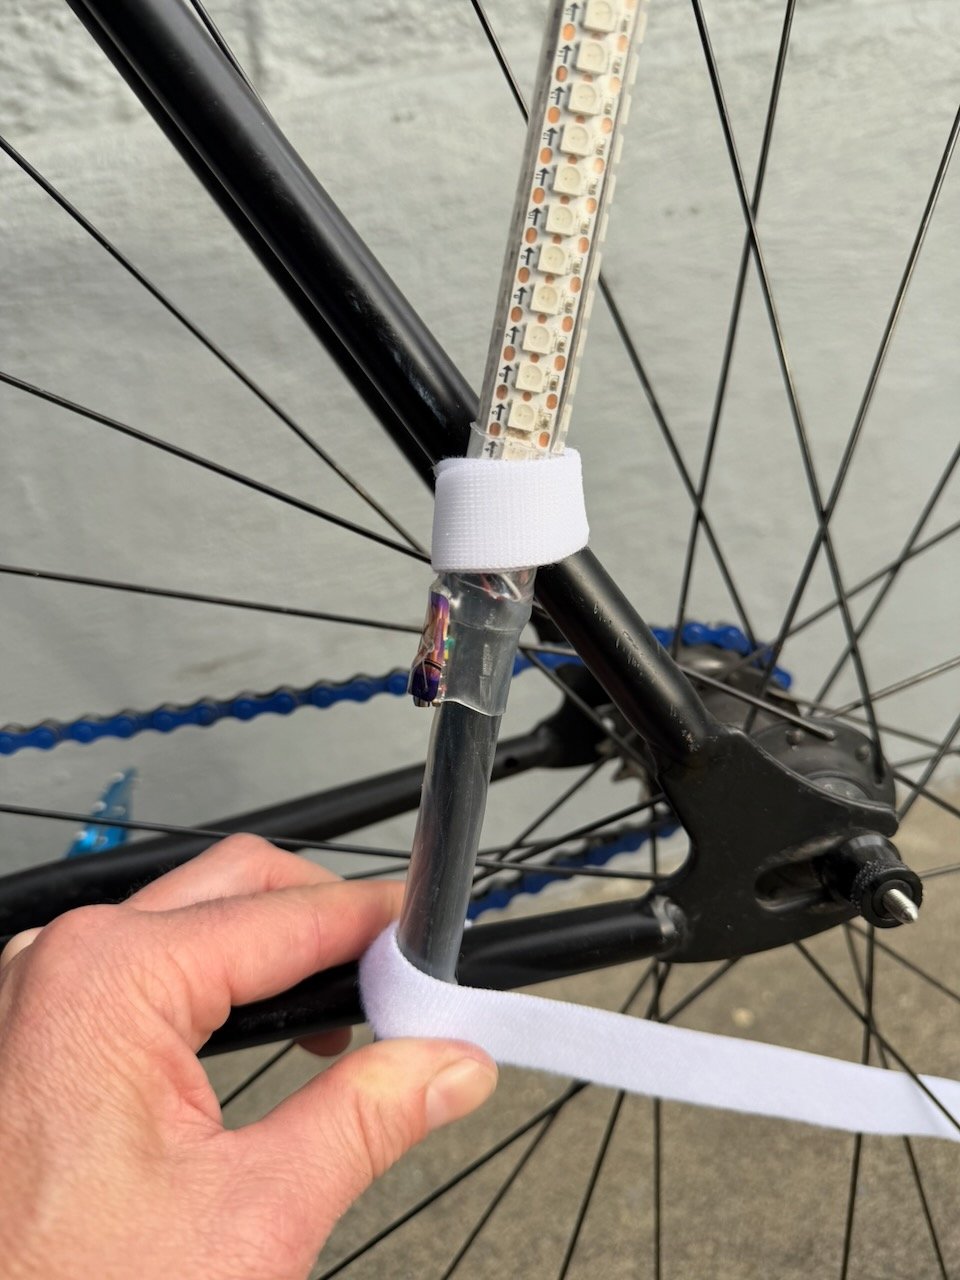
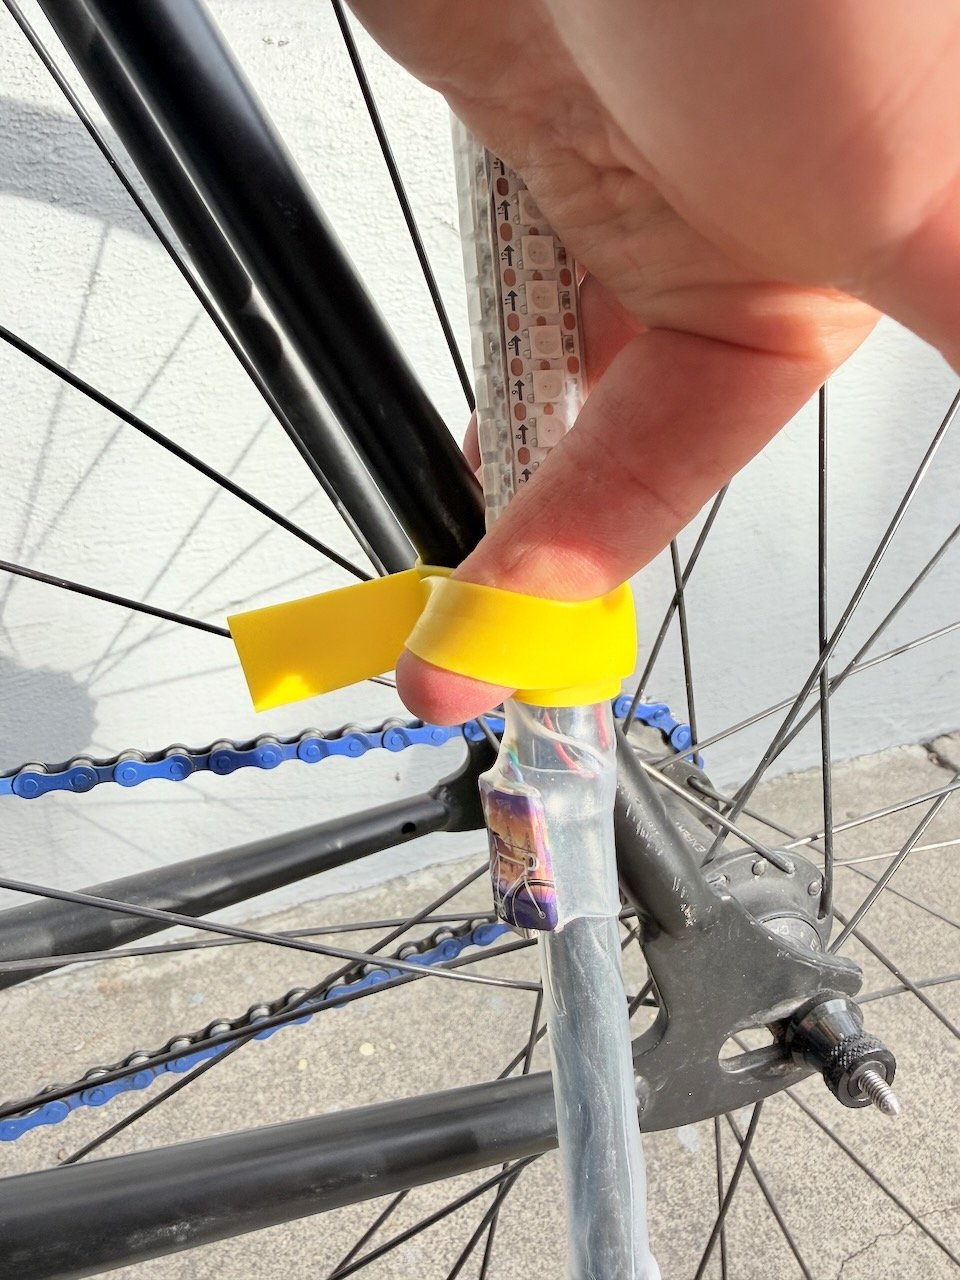
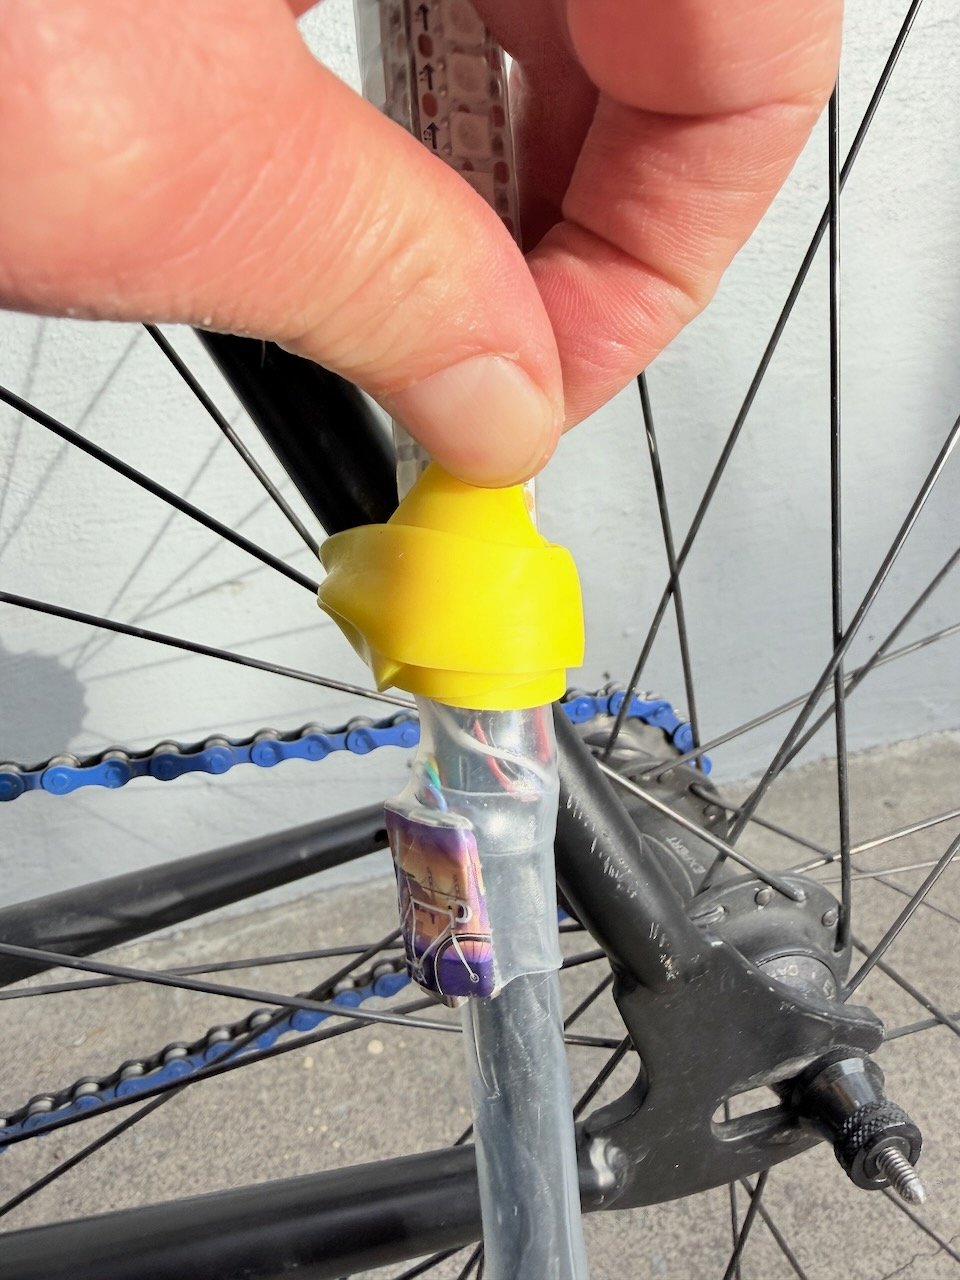
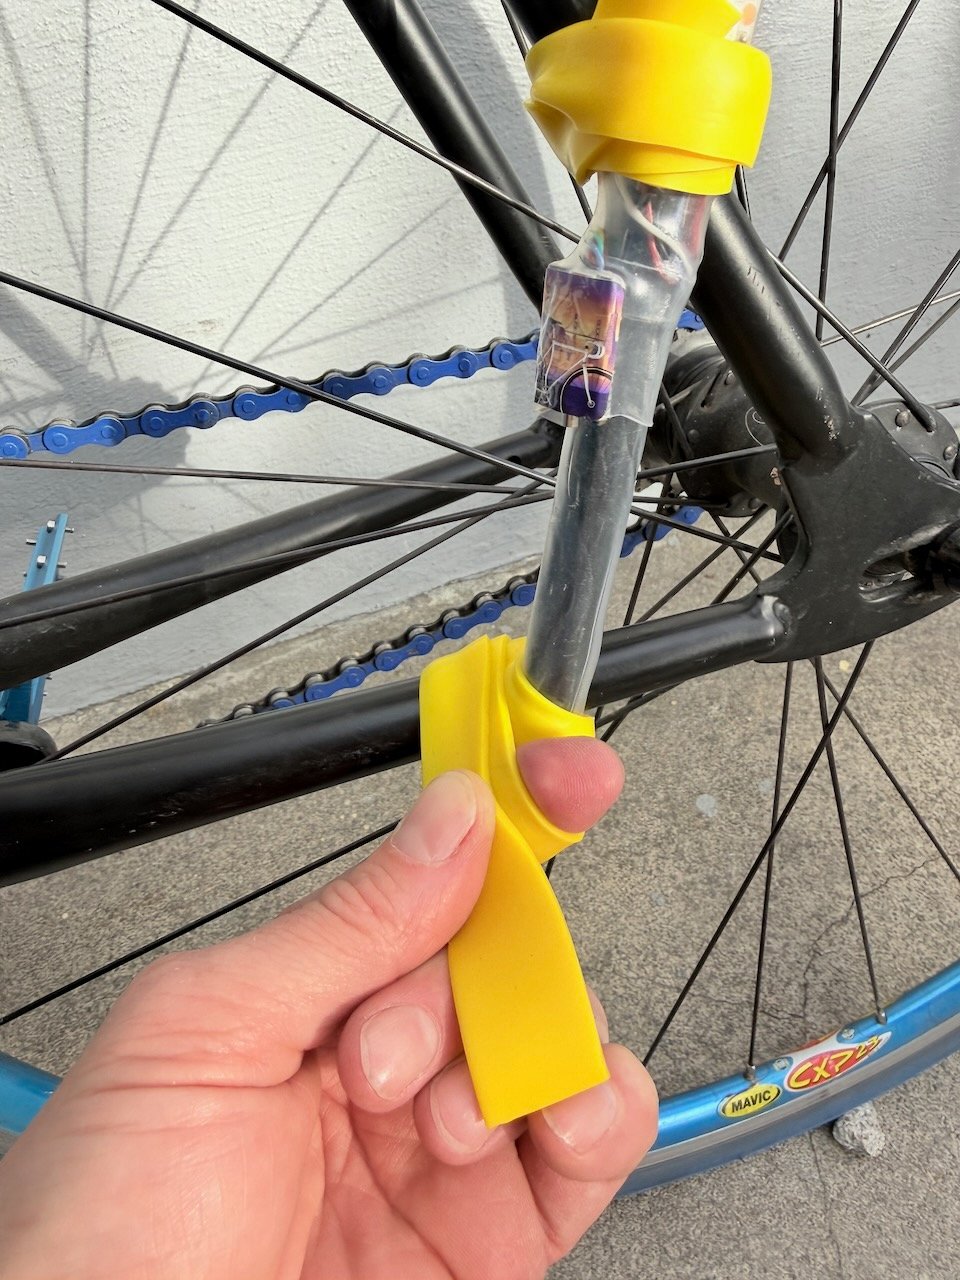
On the last wrap around the pole and frame, place your finger under the strap. Then pull the end of the strap through where your finger was to secure it.

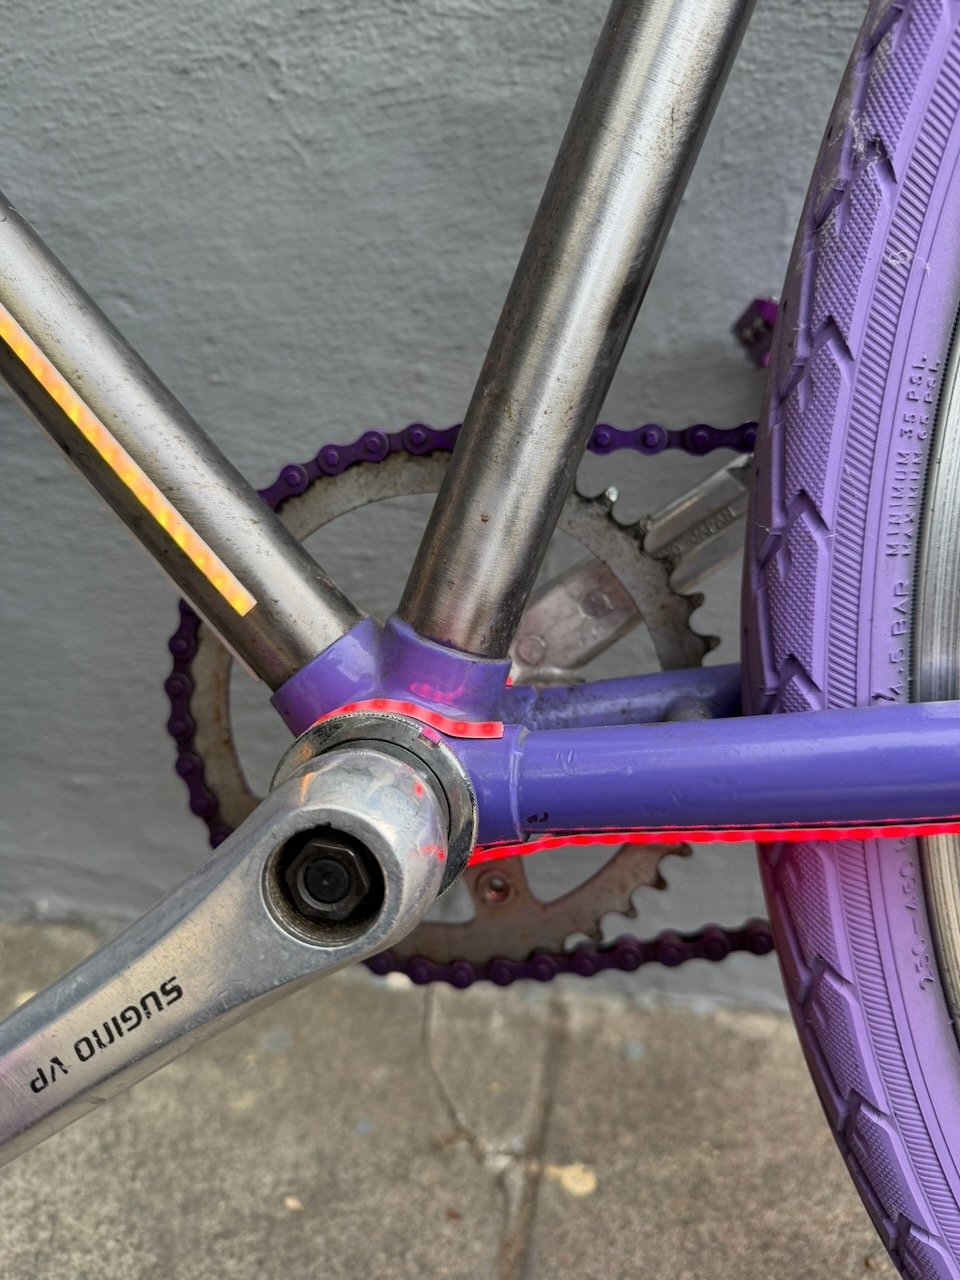
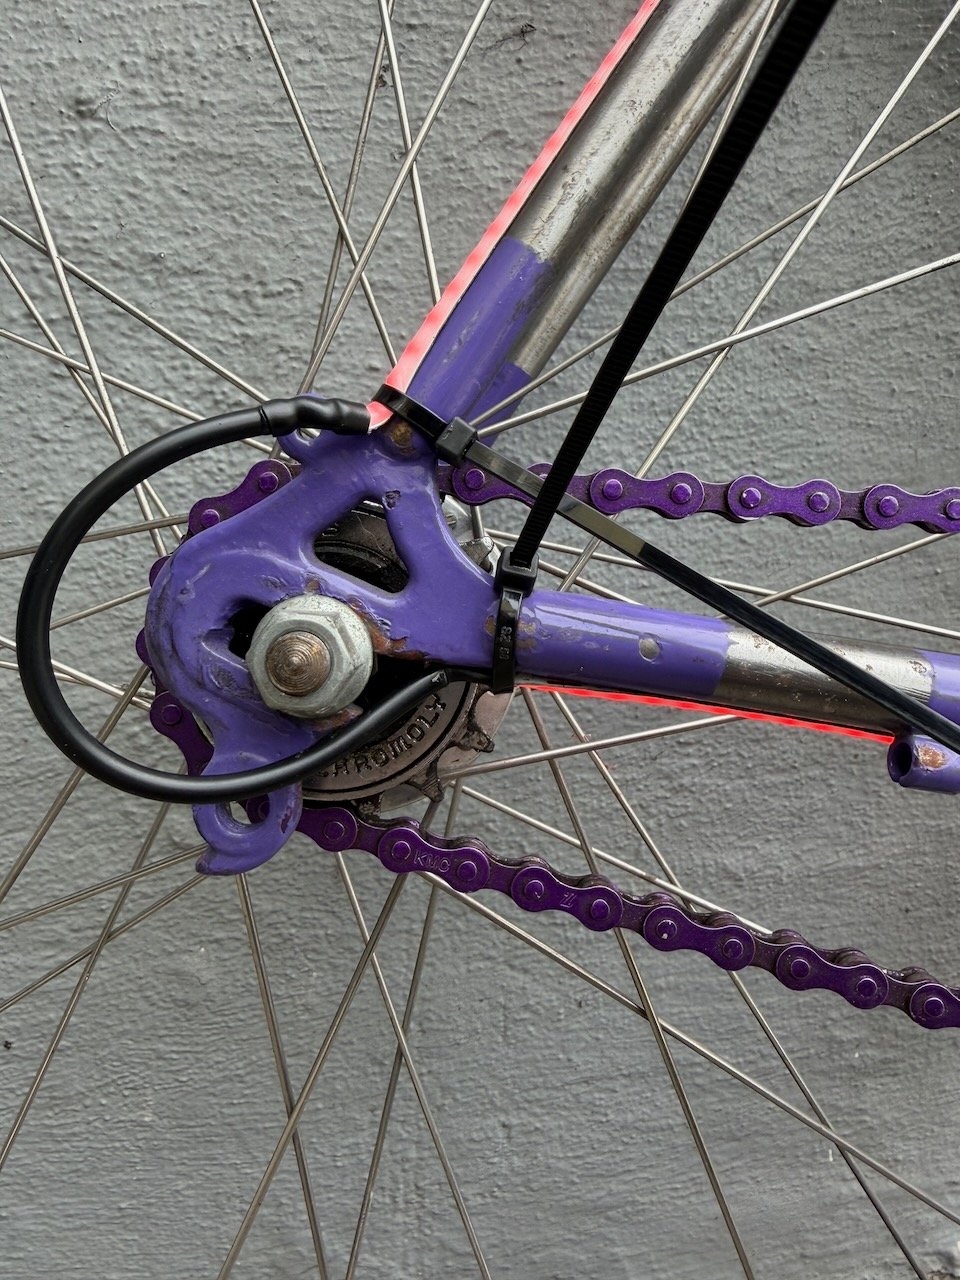
Simply wrap a zip tie around the pole and frame and zip it tight. Repeat for the bottom of the pole. Use a total of 4 zip ties for safety.
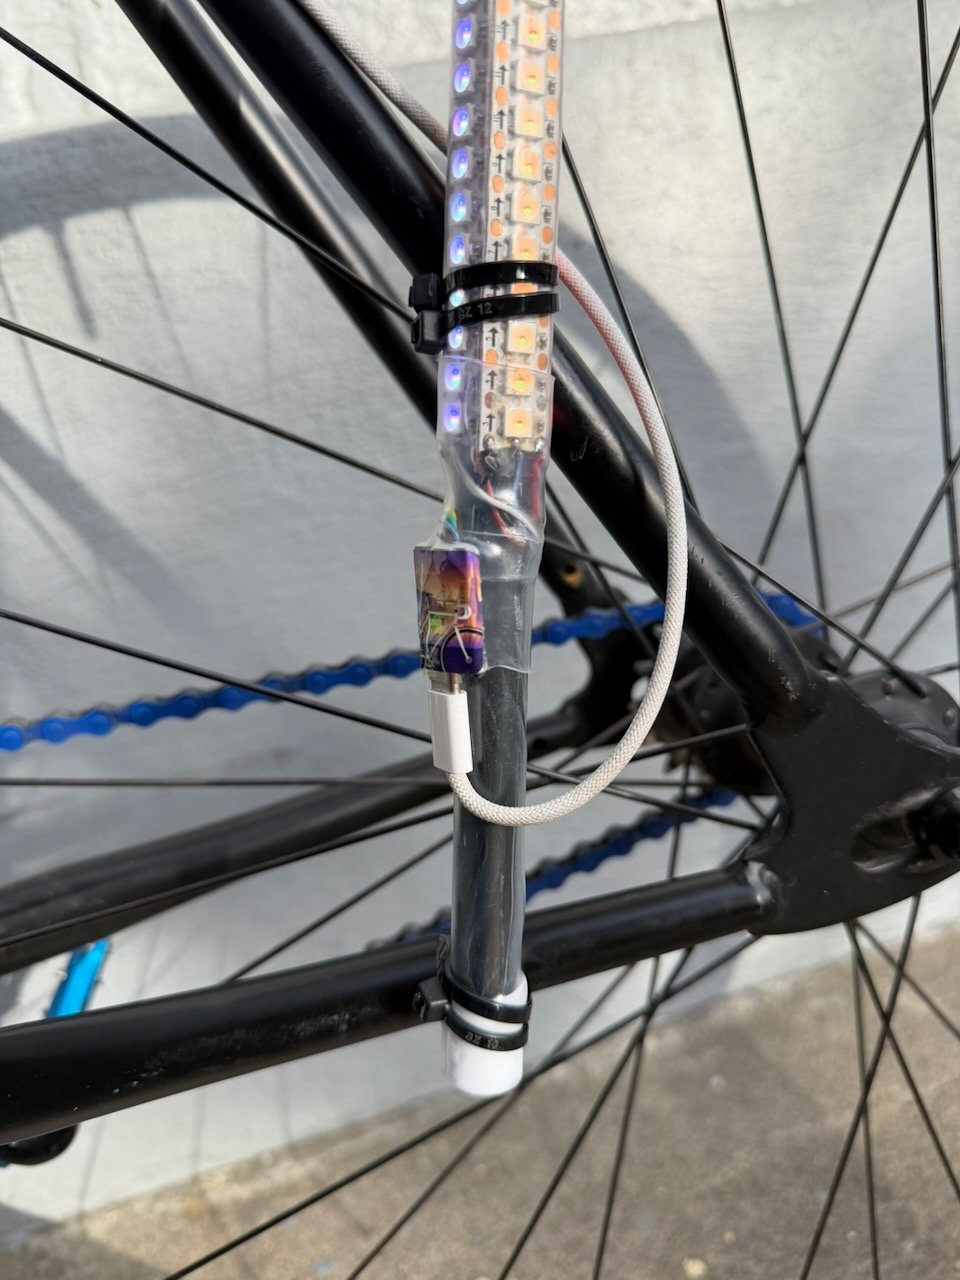
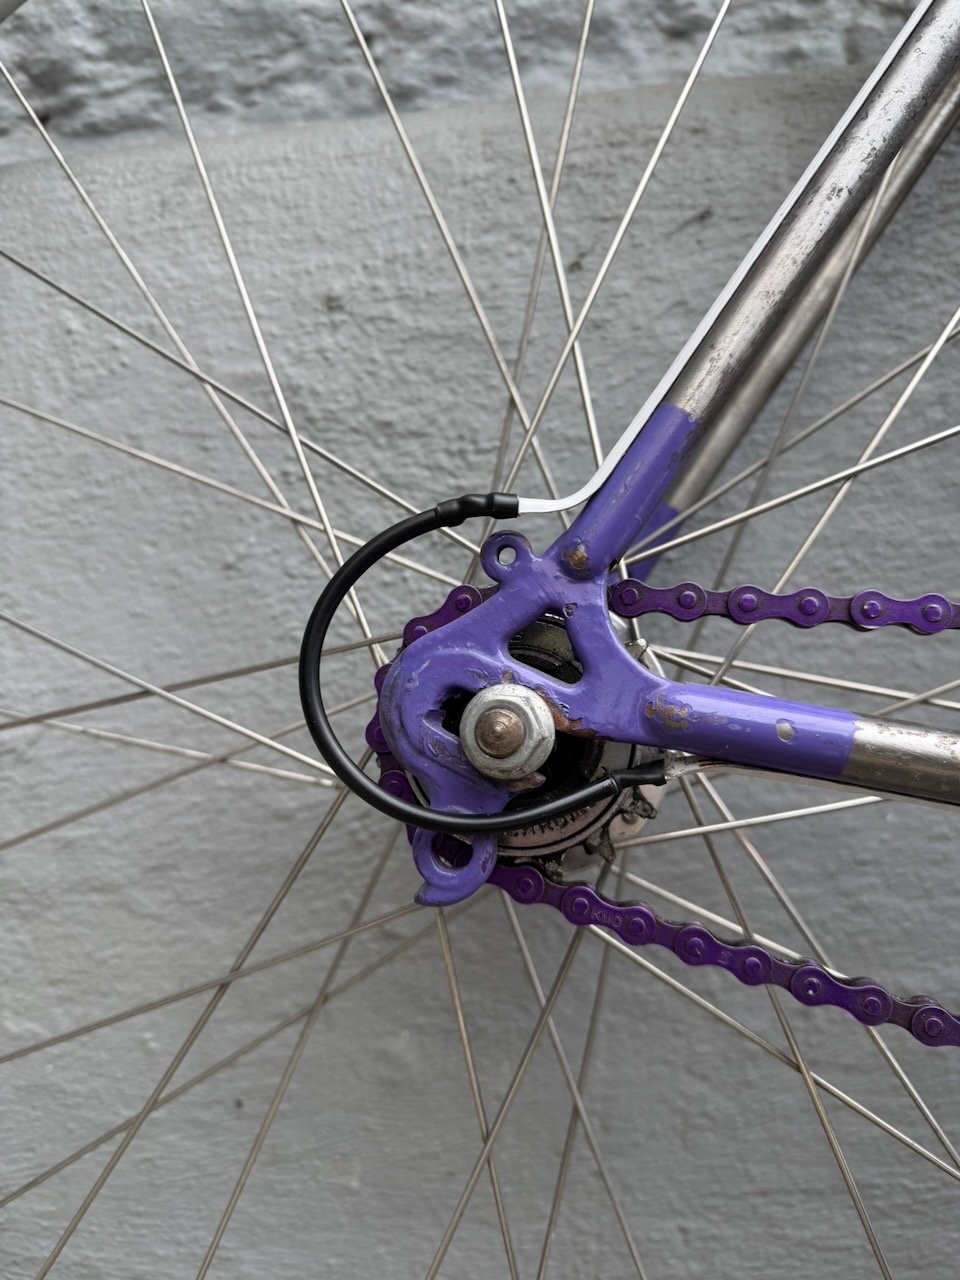
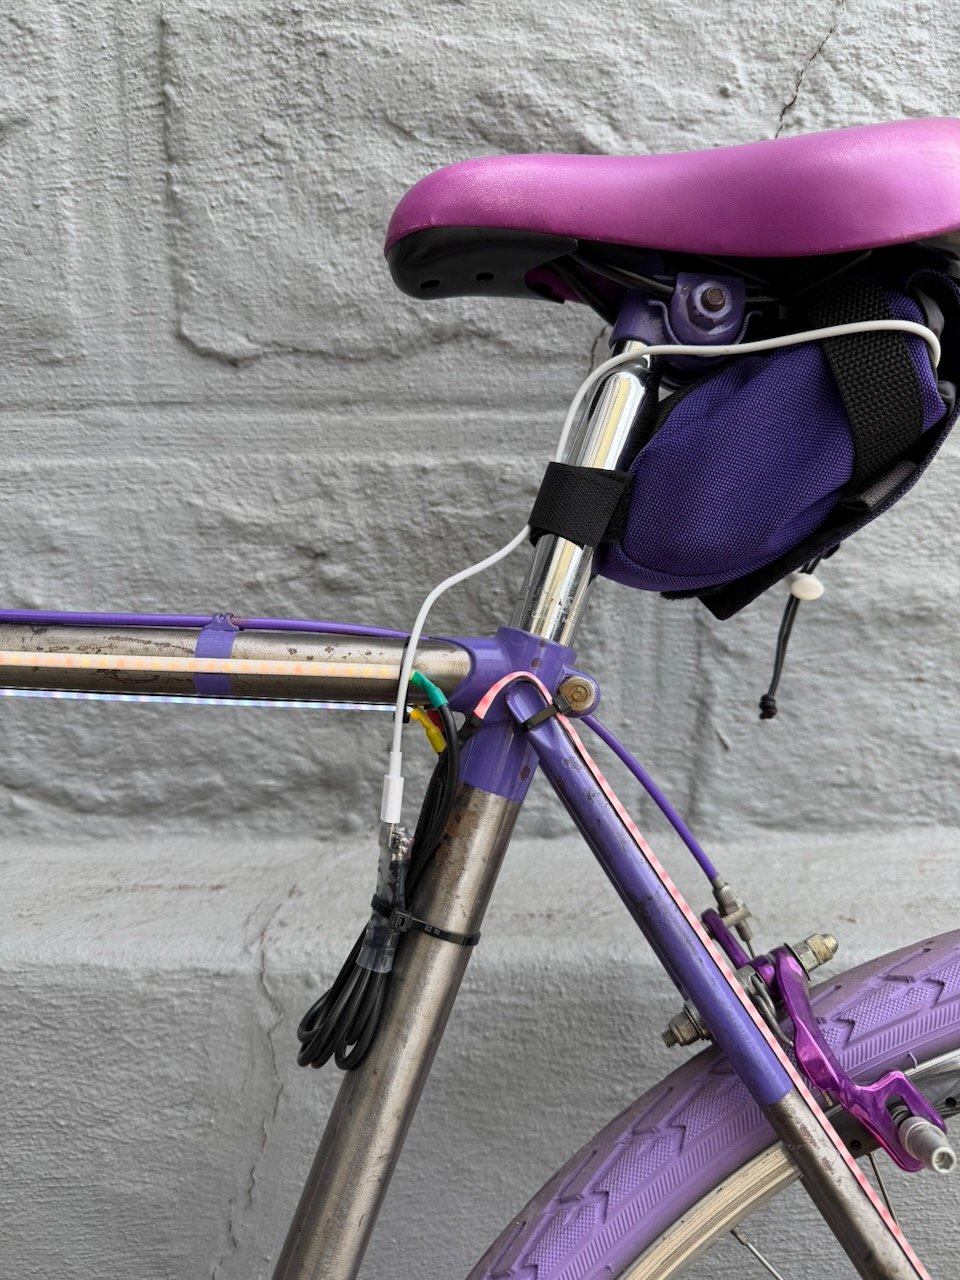
Route the USB-C cable from the controller to your frame bag or saddle bag. Be sure to keep it clear of the wheel, shifters, and brakes. Use extra straps to secure the cable if needed.
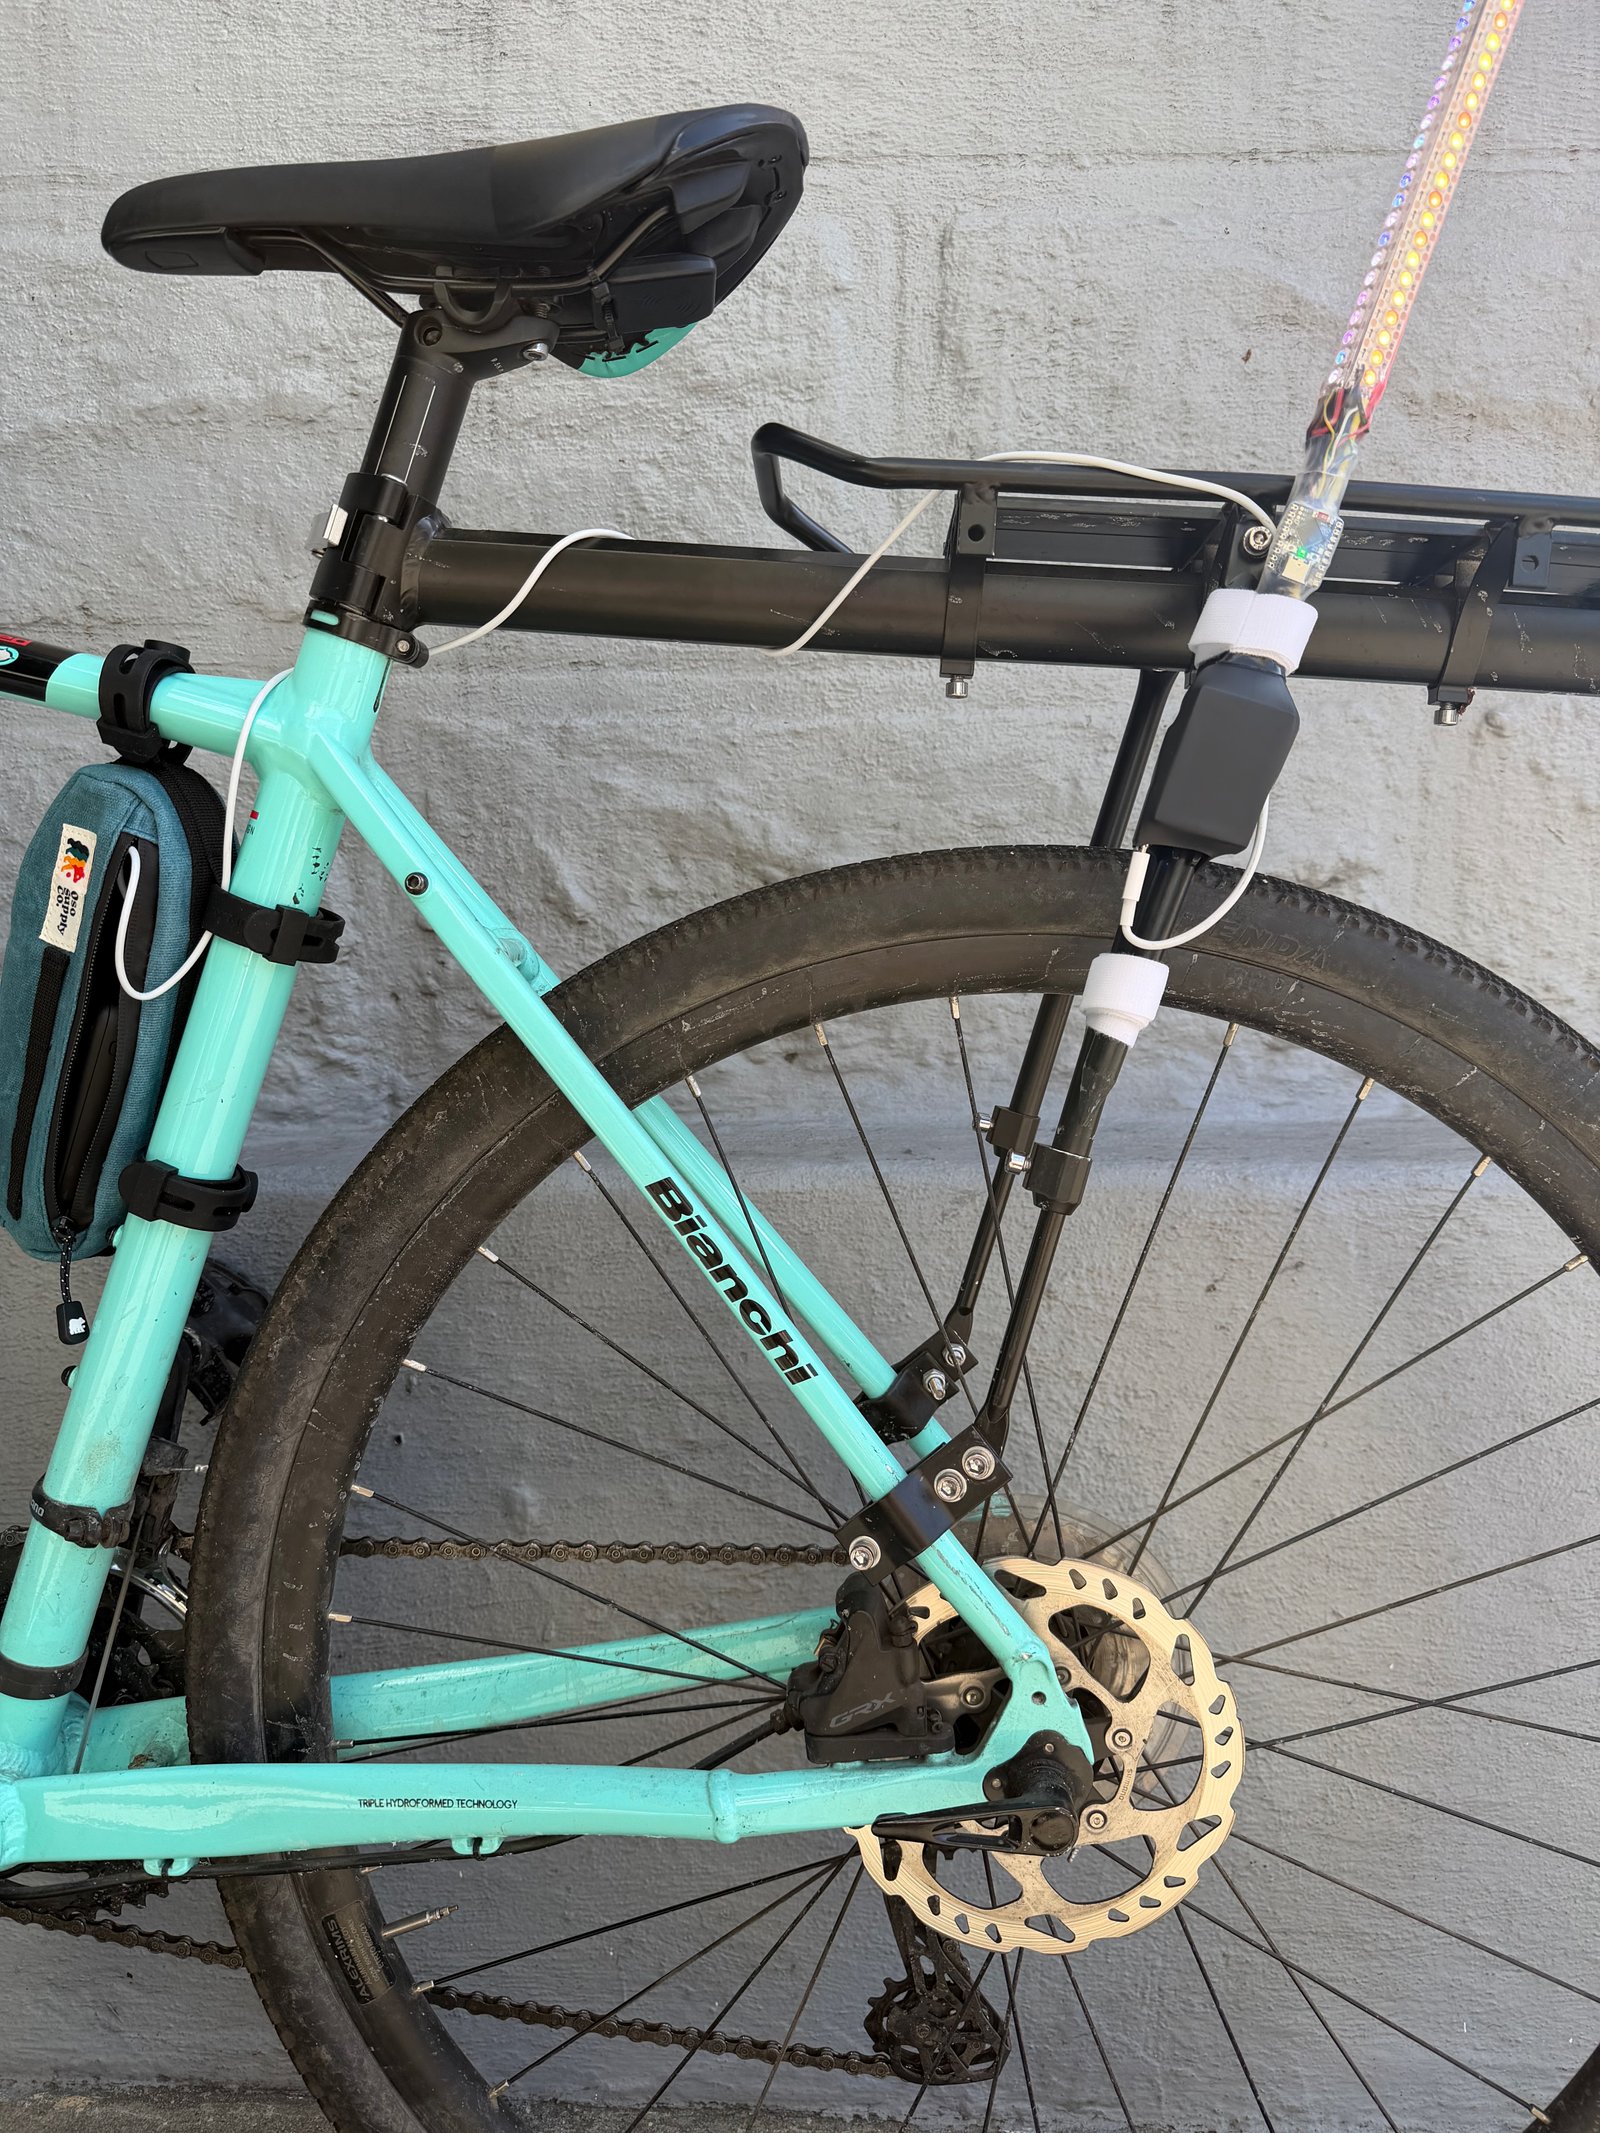
Bike Rack Mounting
Bike rack mounting is similar to frame mounting. Take care that the straps don't interfere with any accessories you plan to use with your bike rack.
Kid's Bike Seat Mounting
The velcro straps are also great for strapping Mission Bike Lights to kid's bike seats through the various holes or handles!
Now let's connect to your lights and customize your settings!
Connect and Setup24" & 32" Pole Installation
The 24" and 32" poles come with an axle mount, similar to bike flags, making installation very easy.
Loosen the rear axle on your bike.
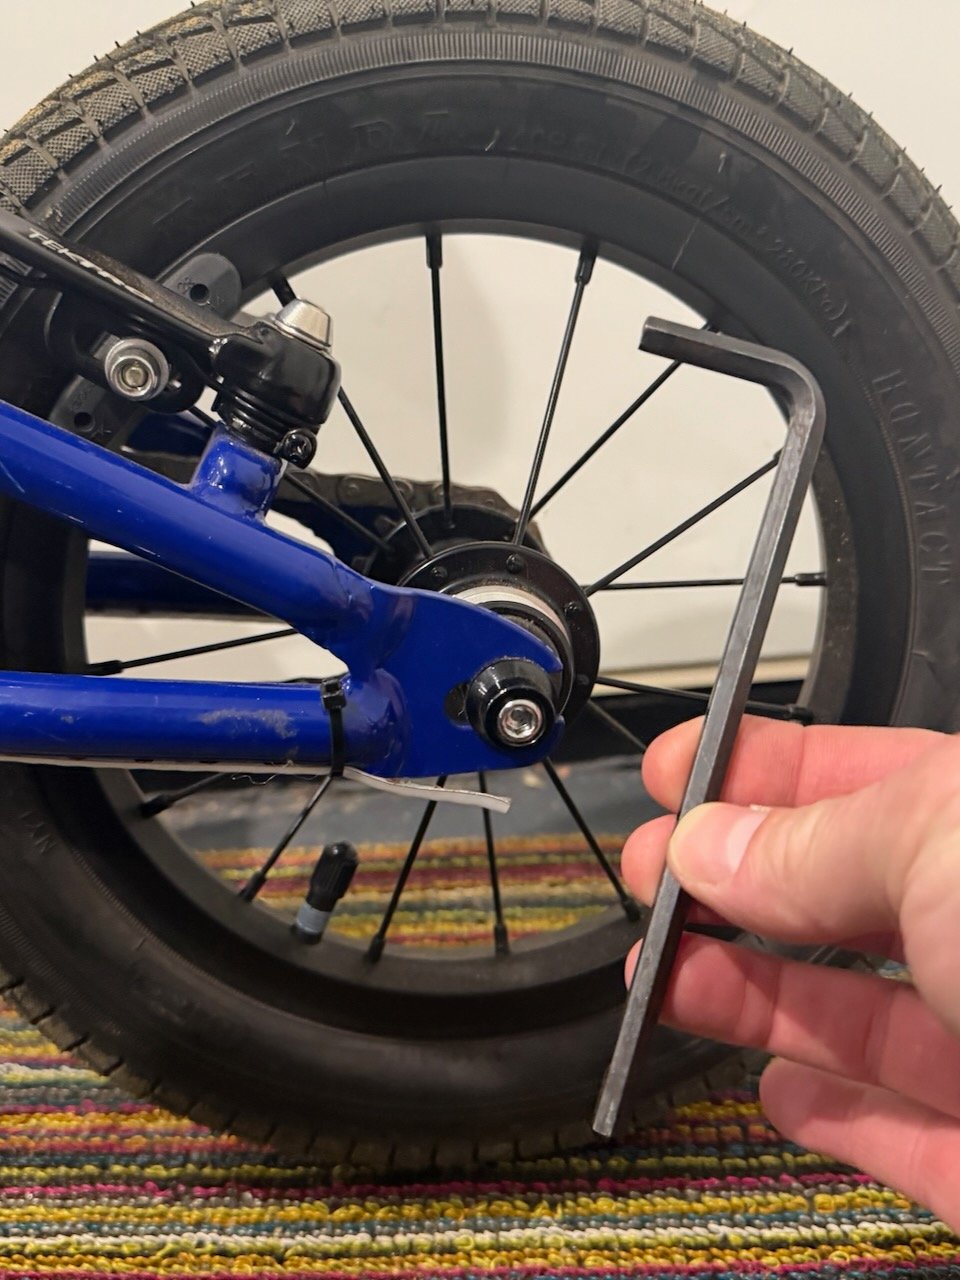
Slide the axle mount into place on the left side of the bike and re-tighten the axle. Take care to make sure the chain is taut and the rear wheel is still straight.
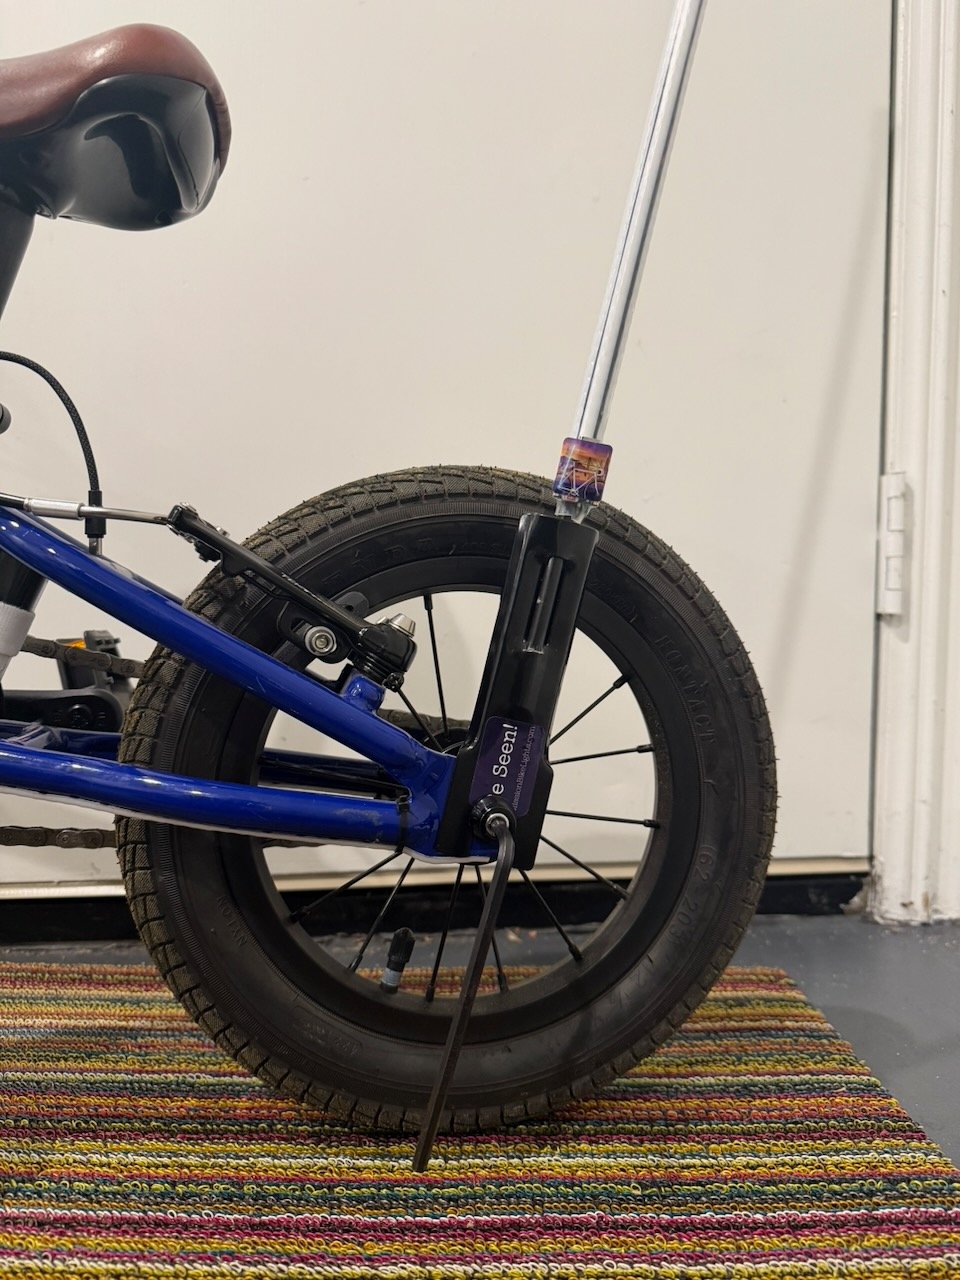
Mount a USB-C battery and route the USB-C cable to the controller.
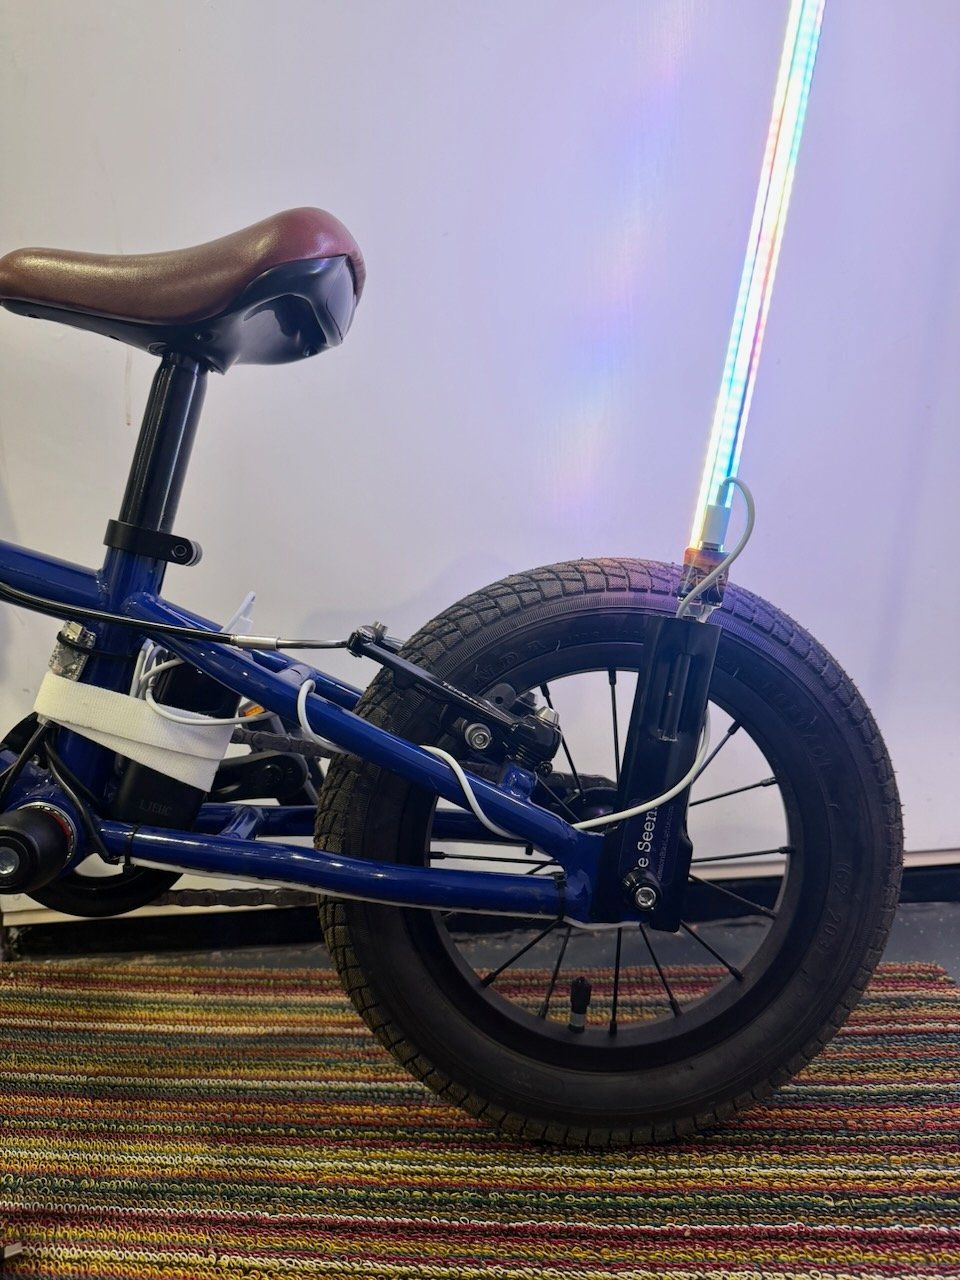
Now let's connect to your lights and customize your settings!
Connect and SetupFrame Adhesive Kit Installation
Follow these steps to install your Mission Bike Lights adhesive LED strips on your bike frame.
This example uses the full frame kit, starting with the top tube of the frame. You can start with either the top tube or the bottom tube, but take note that only the second LED strip can be cut to length. Plan accordingly.
Some light programs feature 360-degree effects, so place each strip in its designated location:
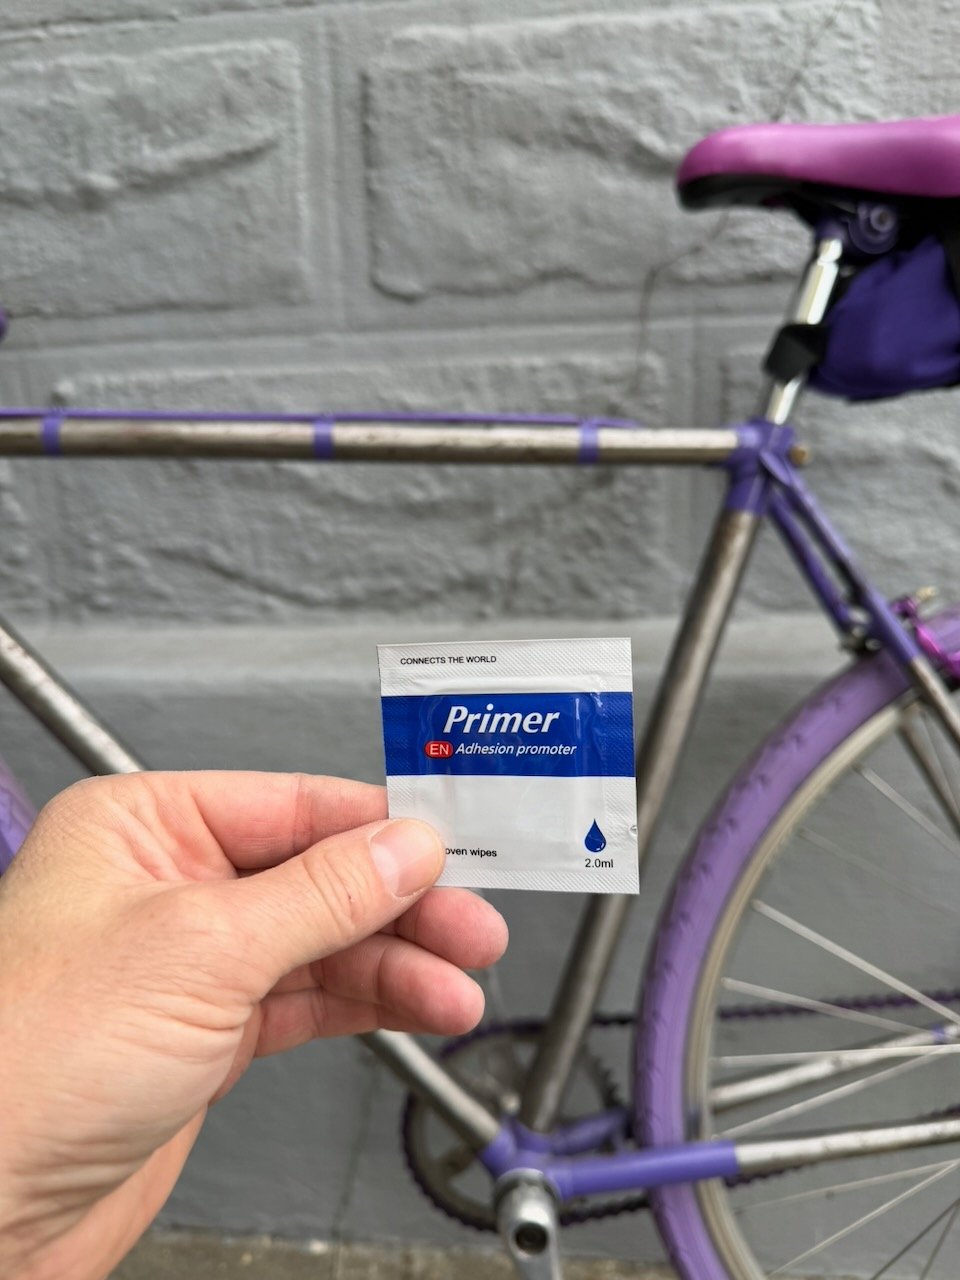
Clean each mounting surface to remove dirt and oils. This ensures the adhesive bonds properly. Use the provided Adhesive Preparation wipes for best results. Isopropyl alcohol wipes also work great and are less likely to fog any paint clear-coating.
Remove the adhesive backing and apply the LED strips to the frame.
Use zip ties at each end of the strips for extra security.
Route the USB-C cable from the controller to your battery.
Power on and enjoy your new lights!
Now let's connect to your lights and customize your settings!
Connect and SetupStroller Kit Installation
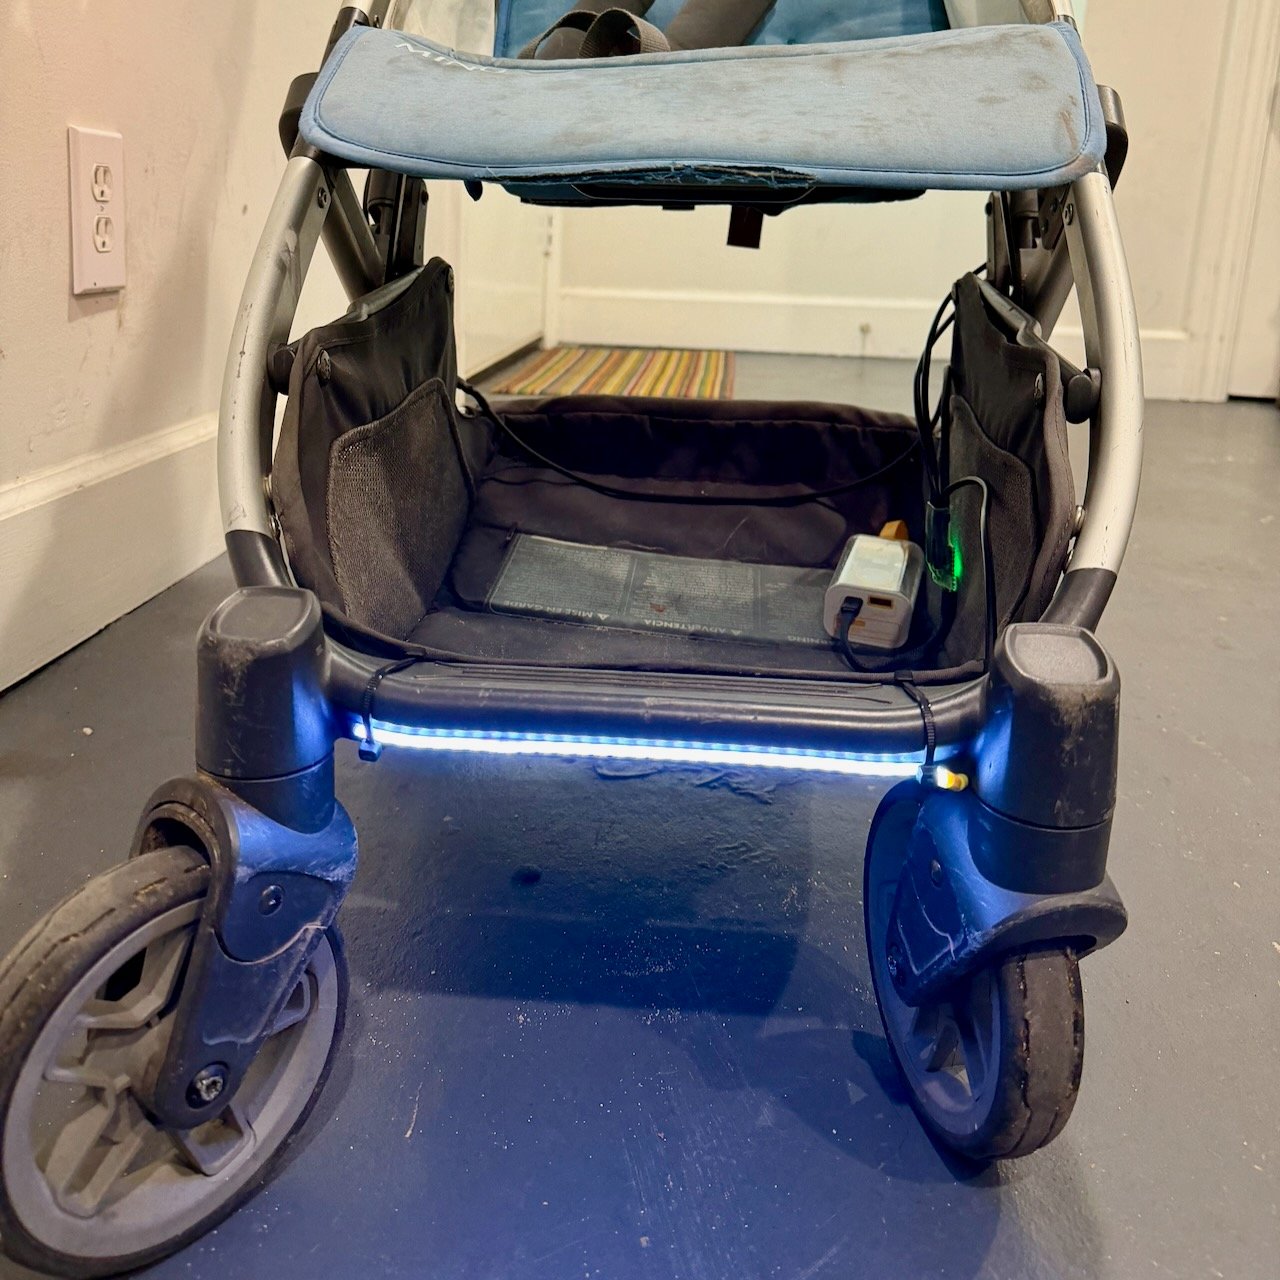
Follow these steps to install your Mission Bike Lights on a stroller. The adhesive LED strips are designed to be flexible and durable for everyday use.
Choose smooth surfaces for each strip. Avoid locations that move when the stroller is folded or areas that may need to be removed for cleaning. Plan where the wires will be routed (Step 4) to ensure the wiring won't interfere with folding the stroller.
Some light programs feature 360-degree effects, so place each strip in its designated location:
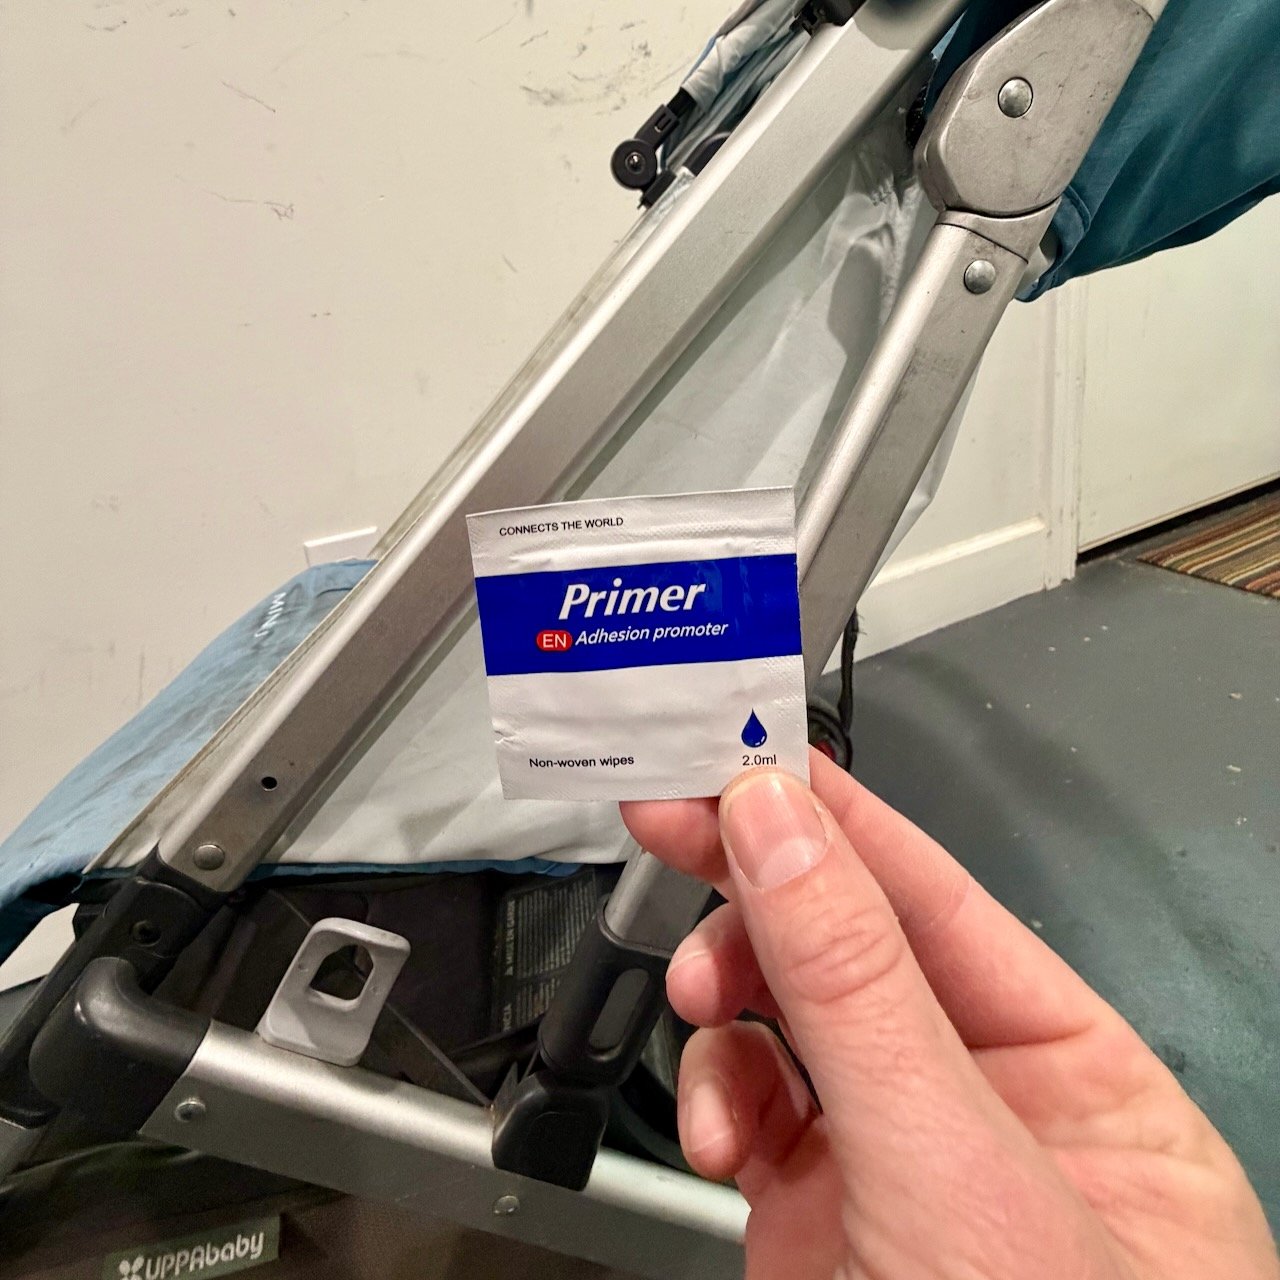
Clean each mounting surface to remove dirt and oils. This ensures the adhesive bonds properly. Use the provided Adhesive Preparation wipes for best results. Isopropyl alcohol wipes also work great and are less likely to fog any paint clear-coating.
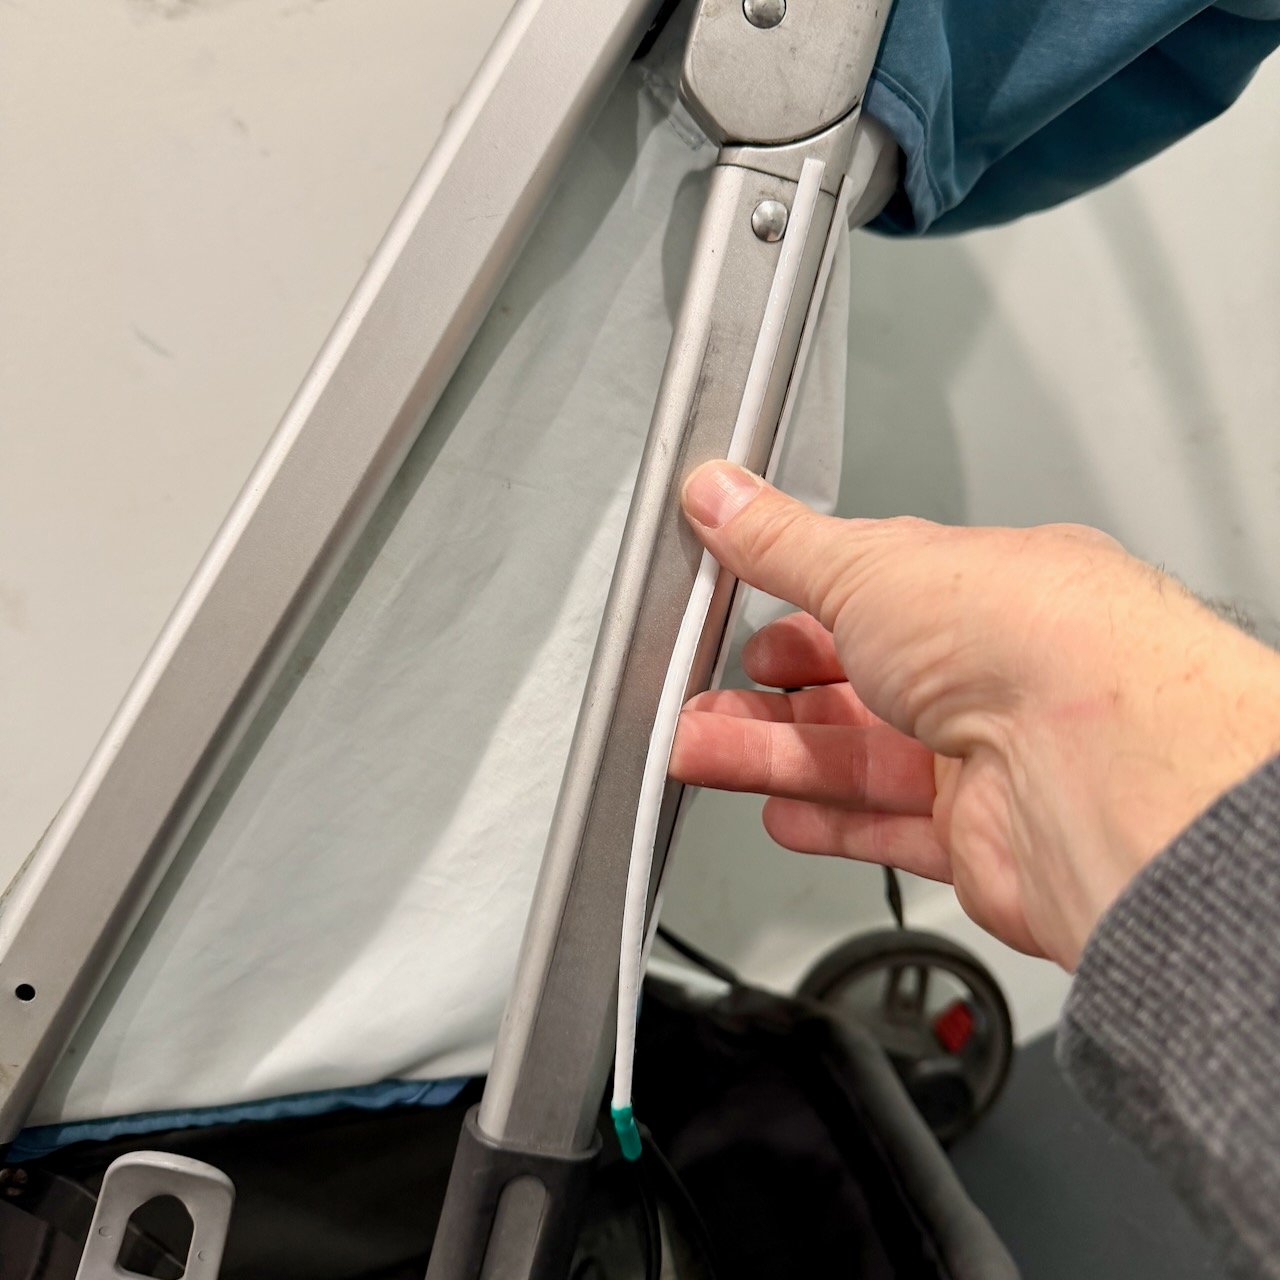
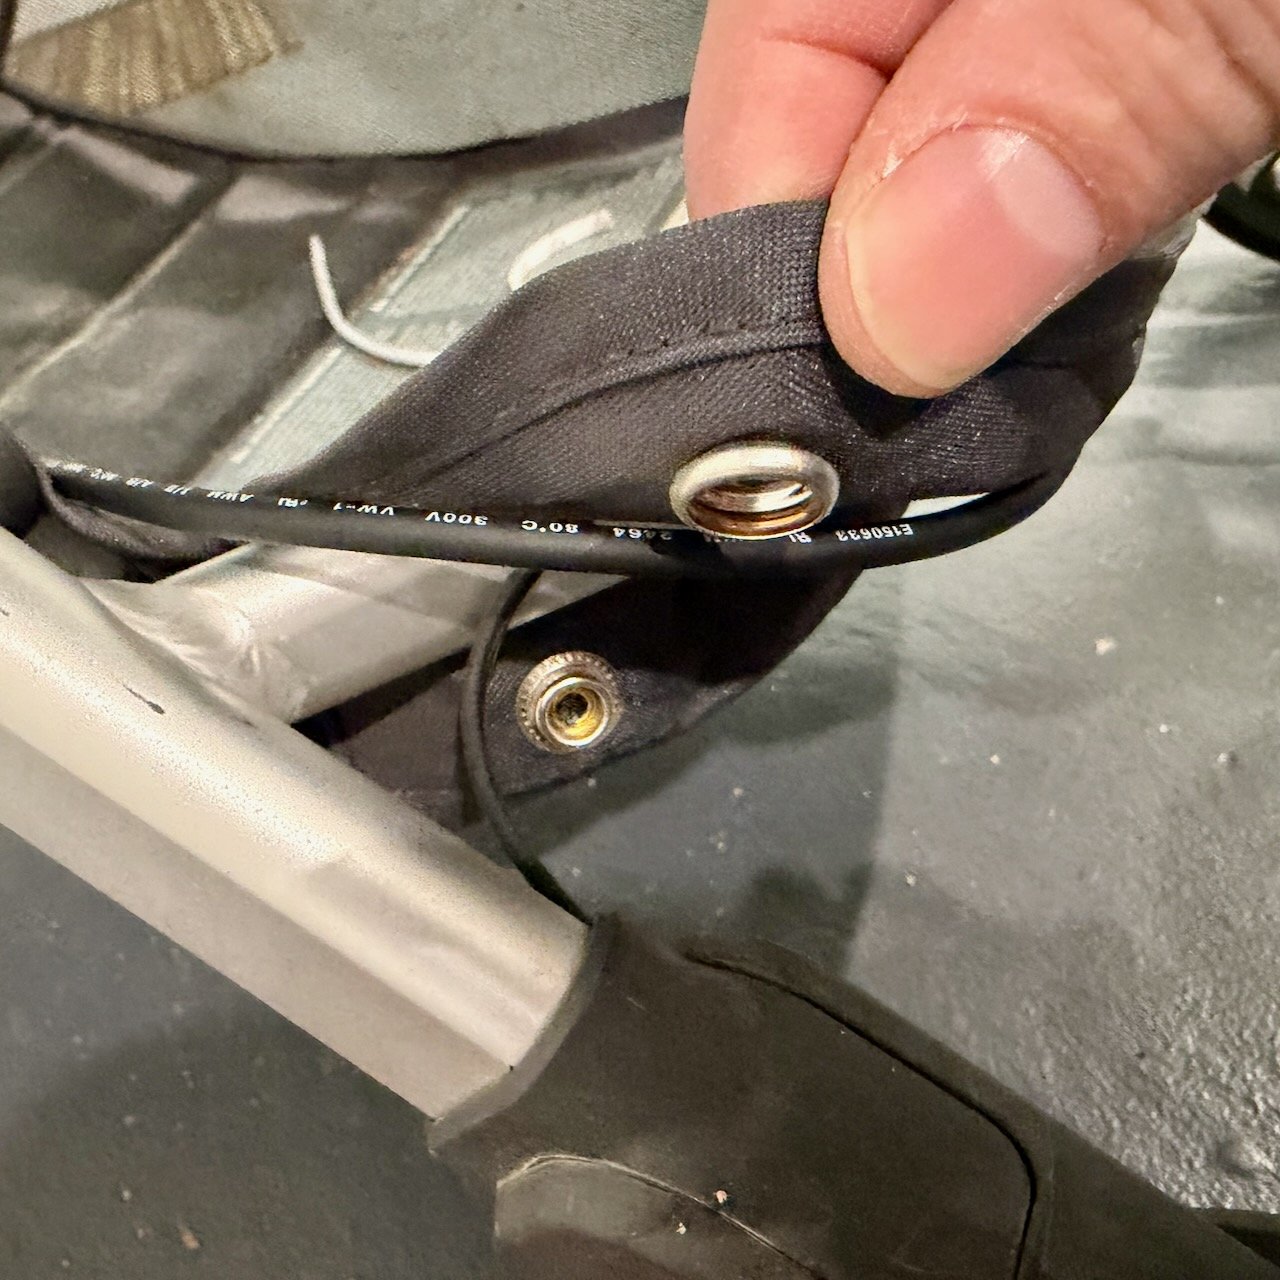
Remove the adhesive backing and apply the LED strips one by one. Route the wires through openings in the stroller frame that won't pinch when the stroller is folded.
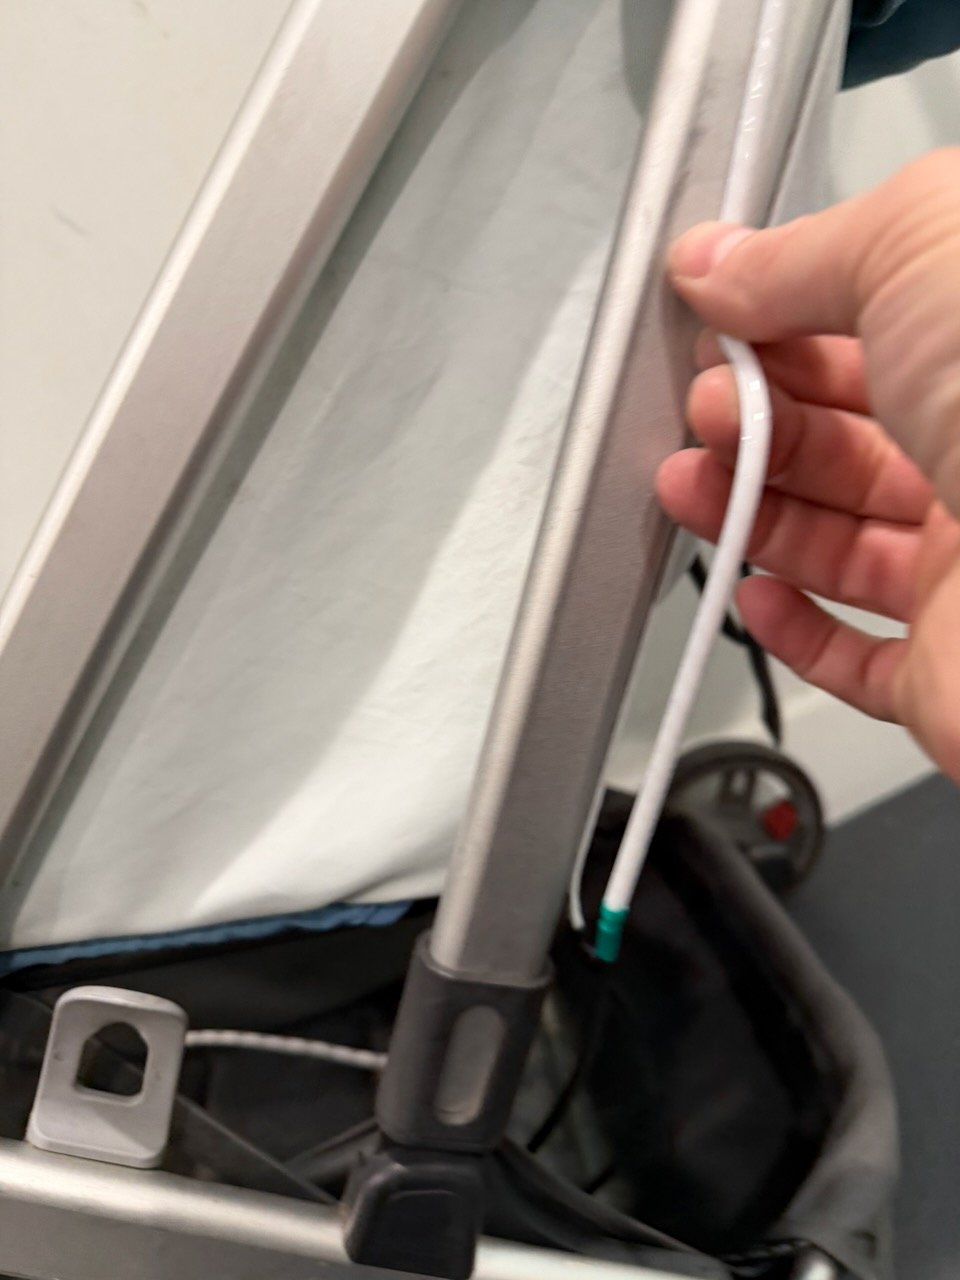
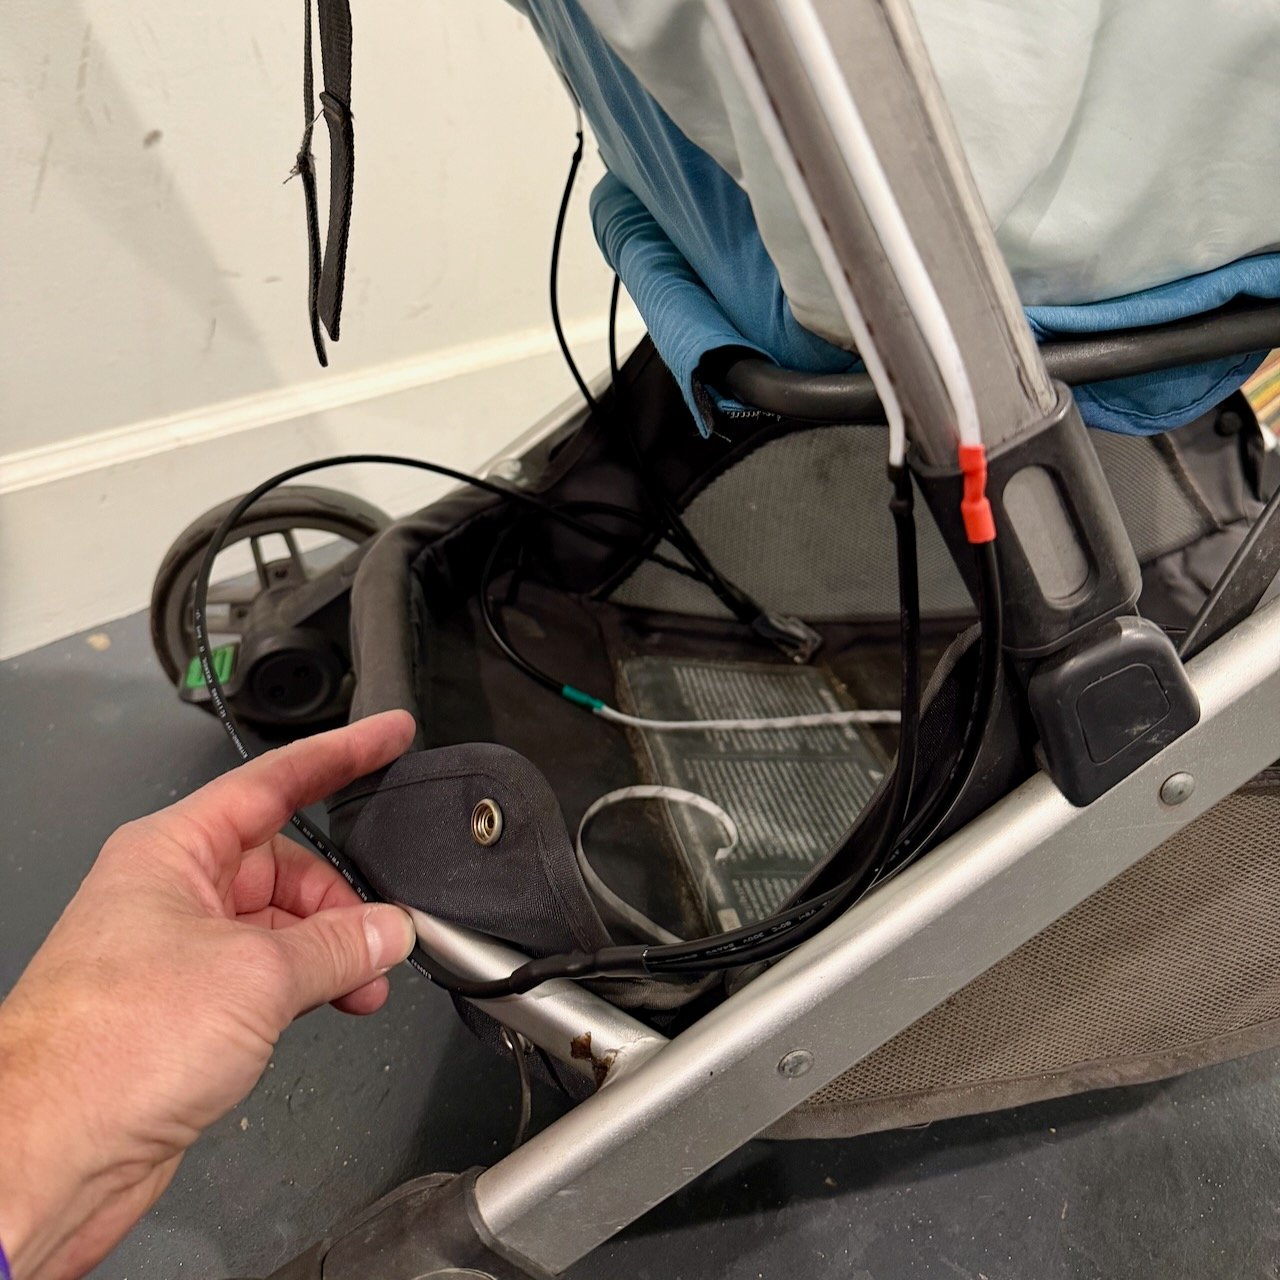
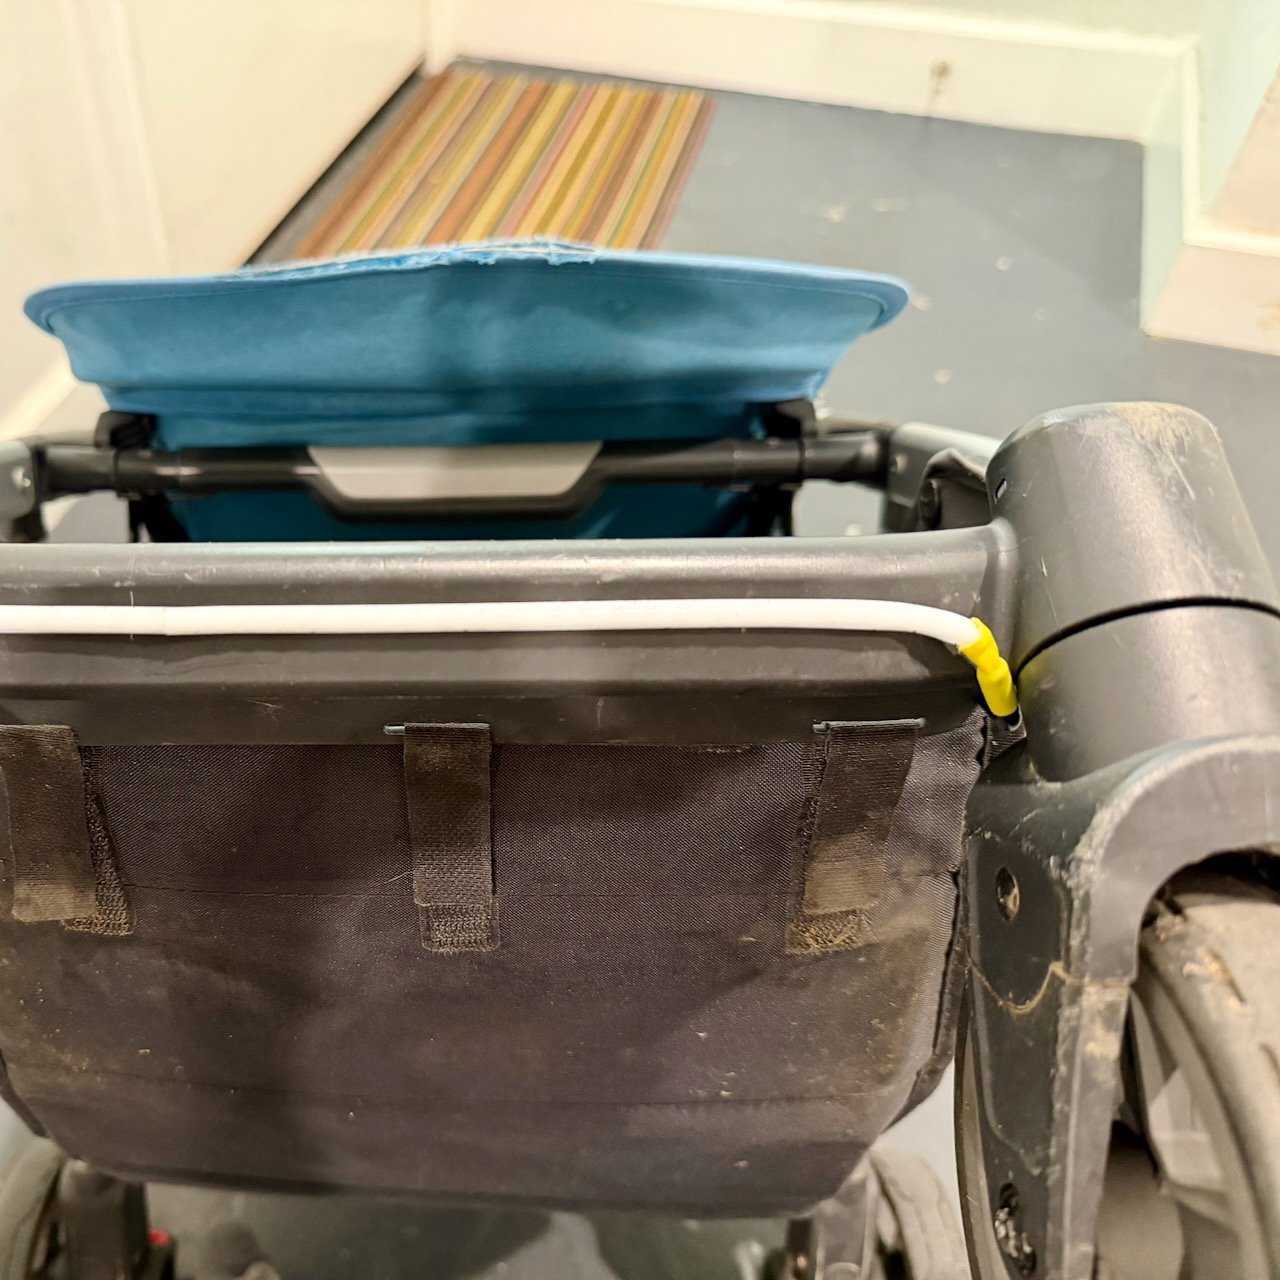
Route the long wire that connects the left and right sides. Many strollers have removable bottom baskets, which provide a convenient place to hide the wire.
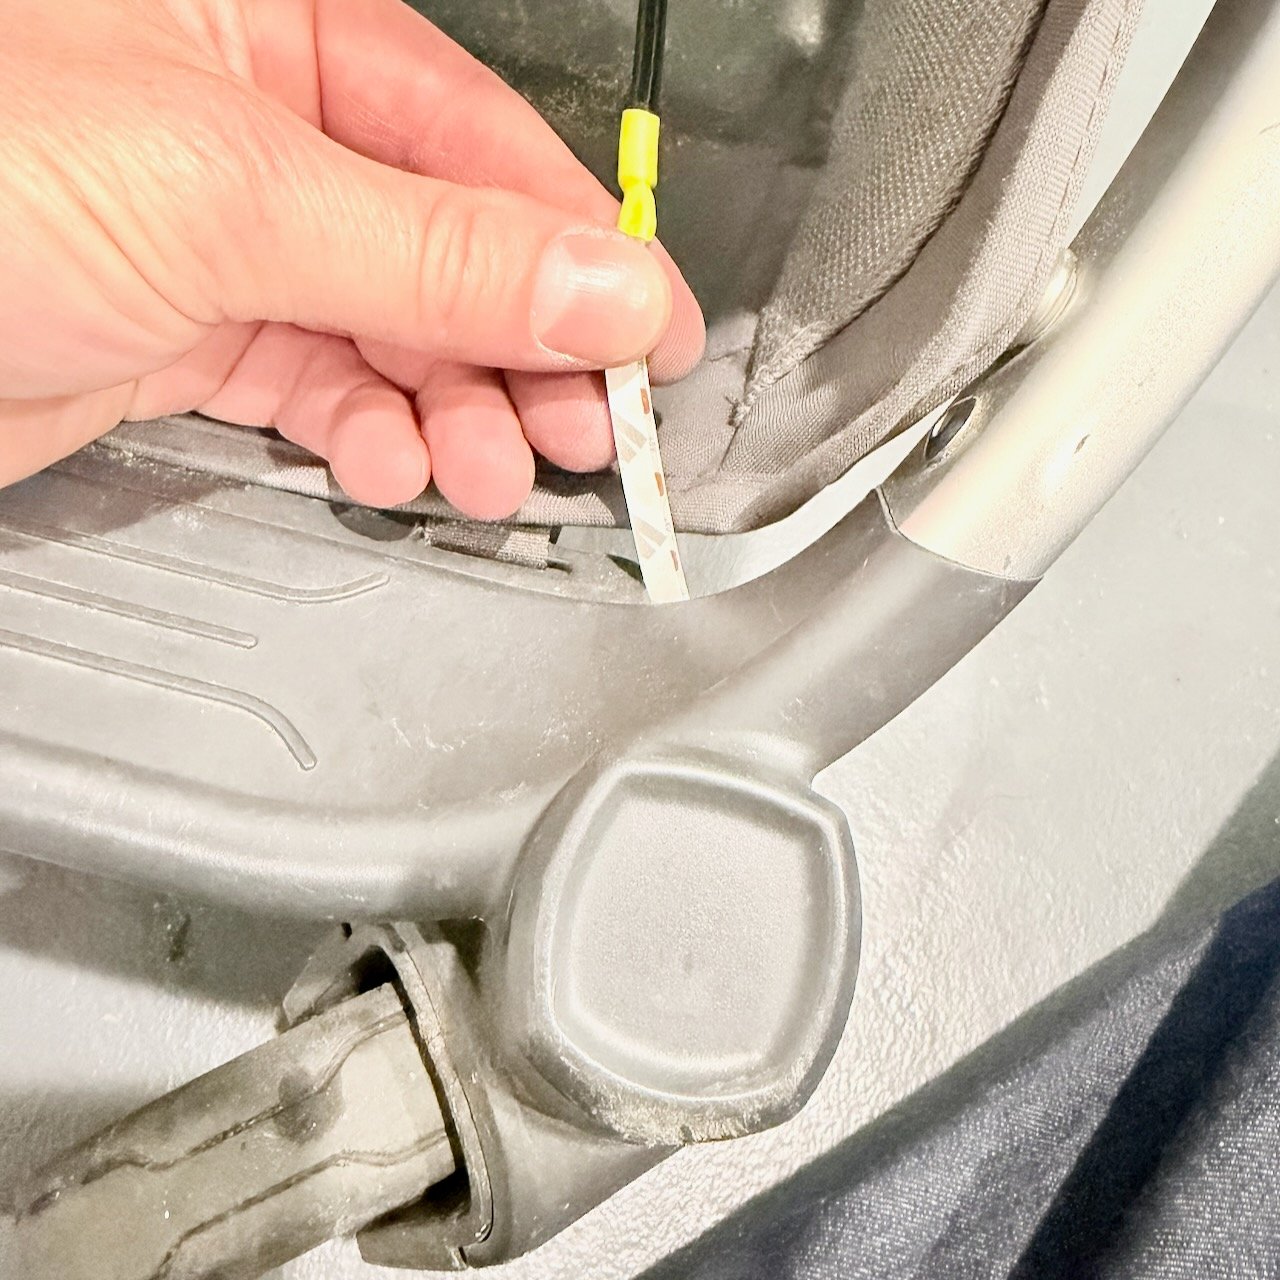
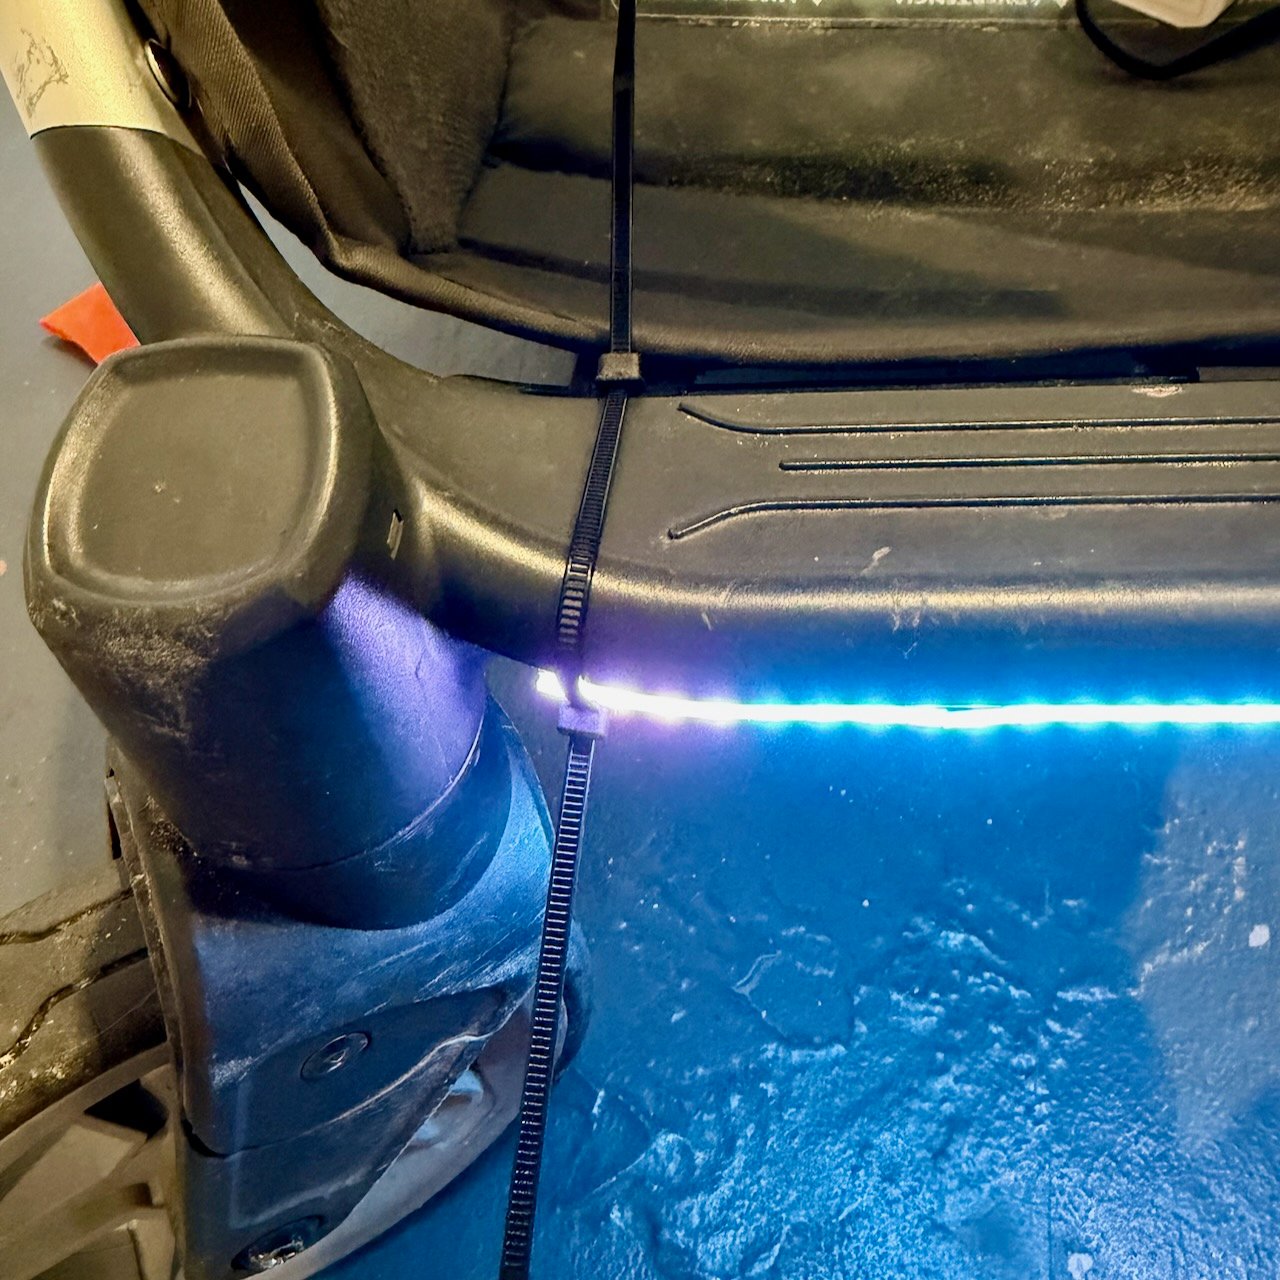
Route the front strip wire and apply the strip to a front-facing location. Position the strip under the stroller's front step so it won't get stepped on or kicked.
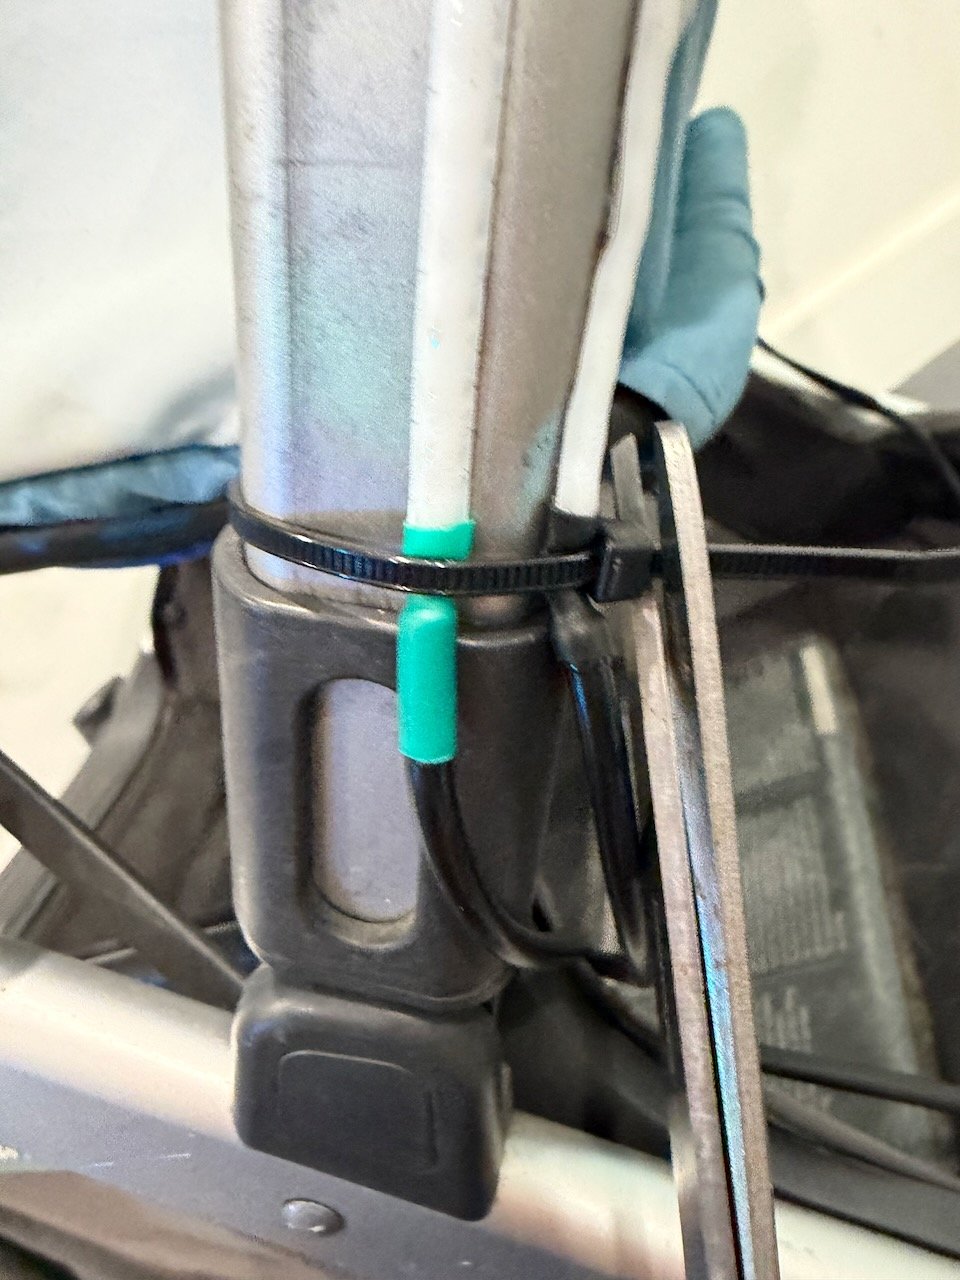
If any strips are too long, carefully trim them at the designated cut points. Wire cutters work best, but sharp scissors will also work.
Important: Disconnect power before trimming strips. Only cut at the thin black markings on the strip.

Use a zip tie at each end of the strips for extra security. You may need to connect two zip ties end-to-end to reach around larger stroller hardware.
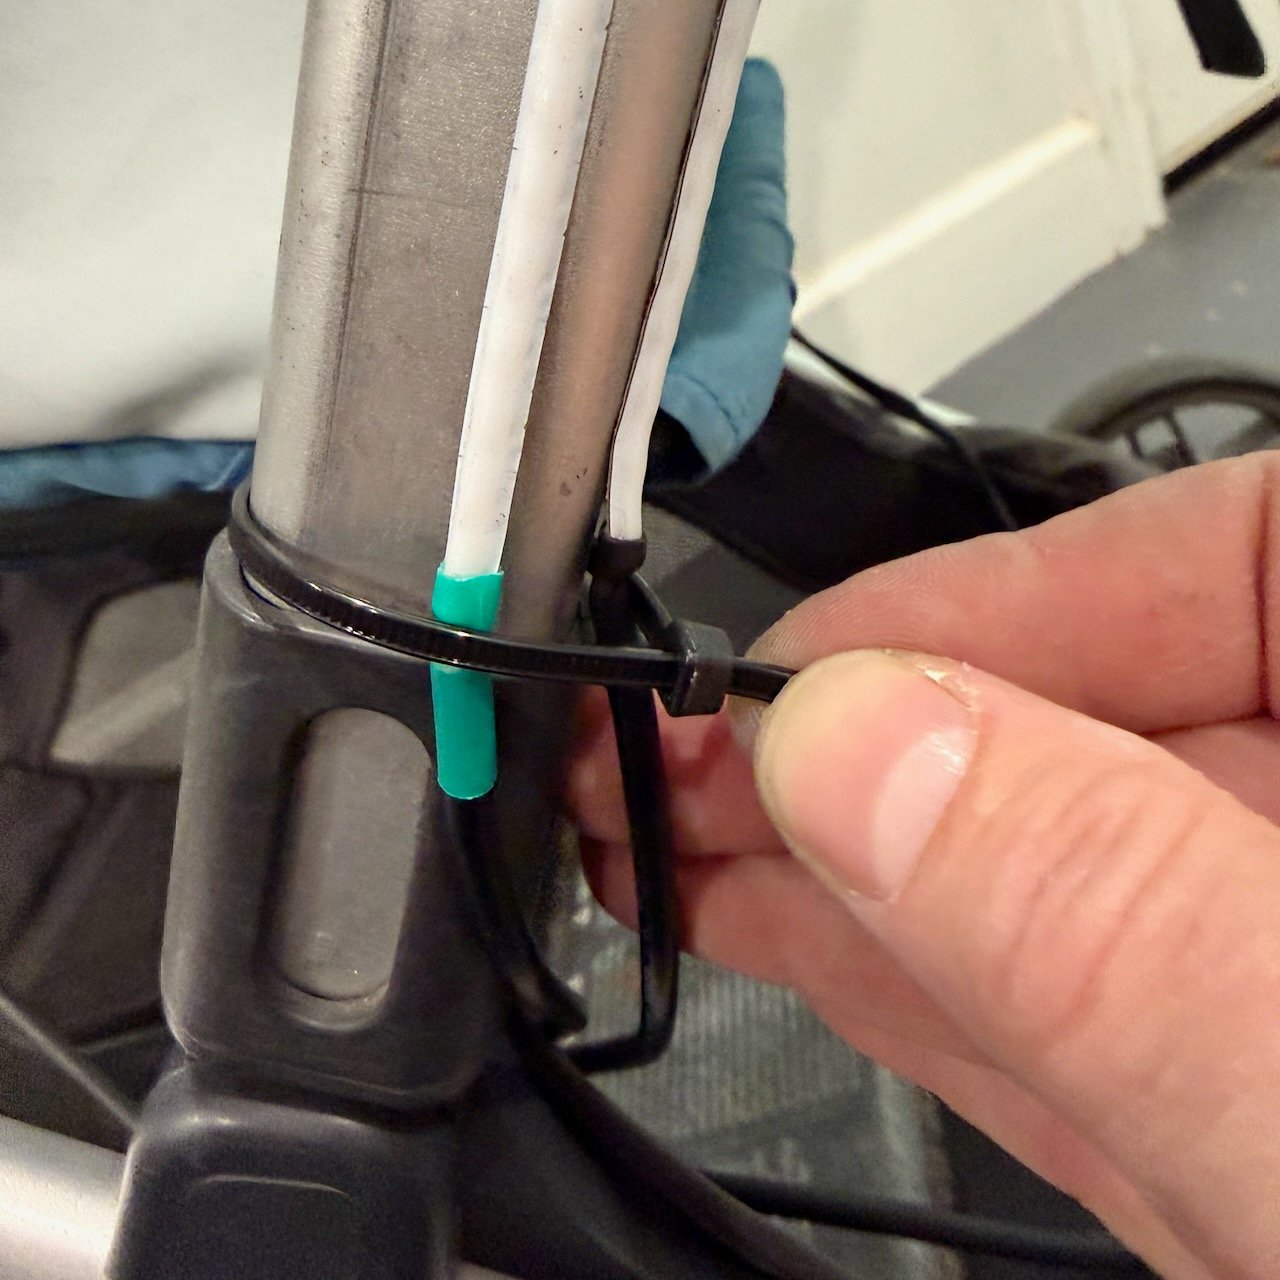
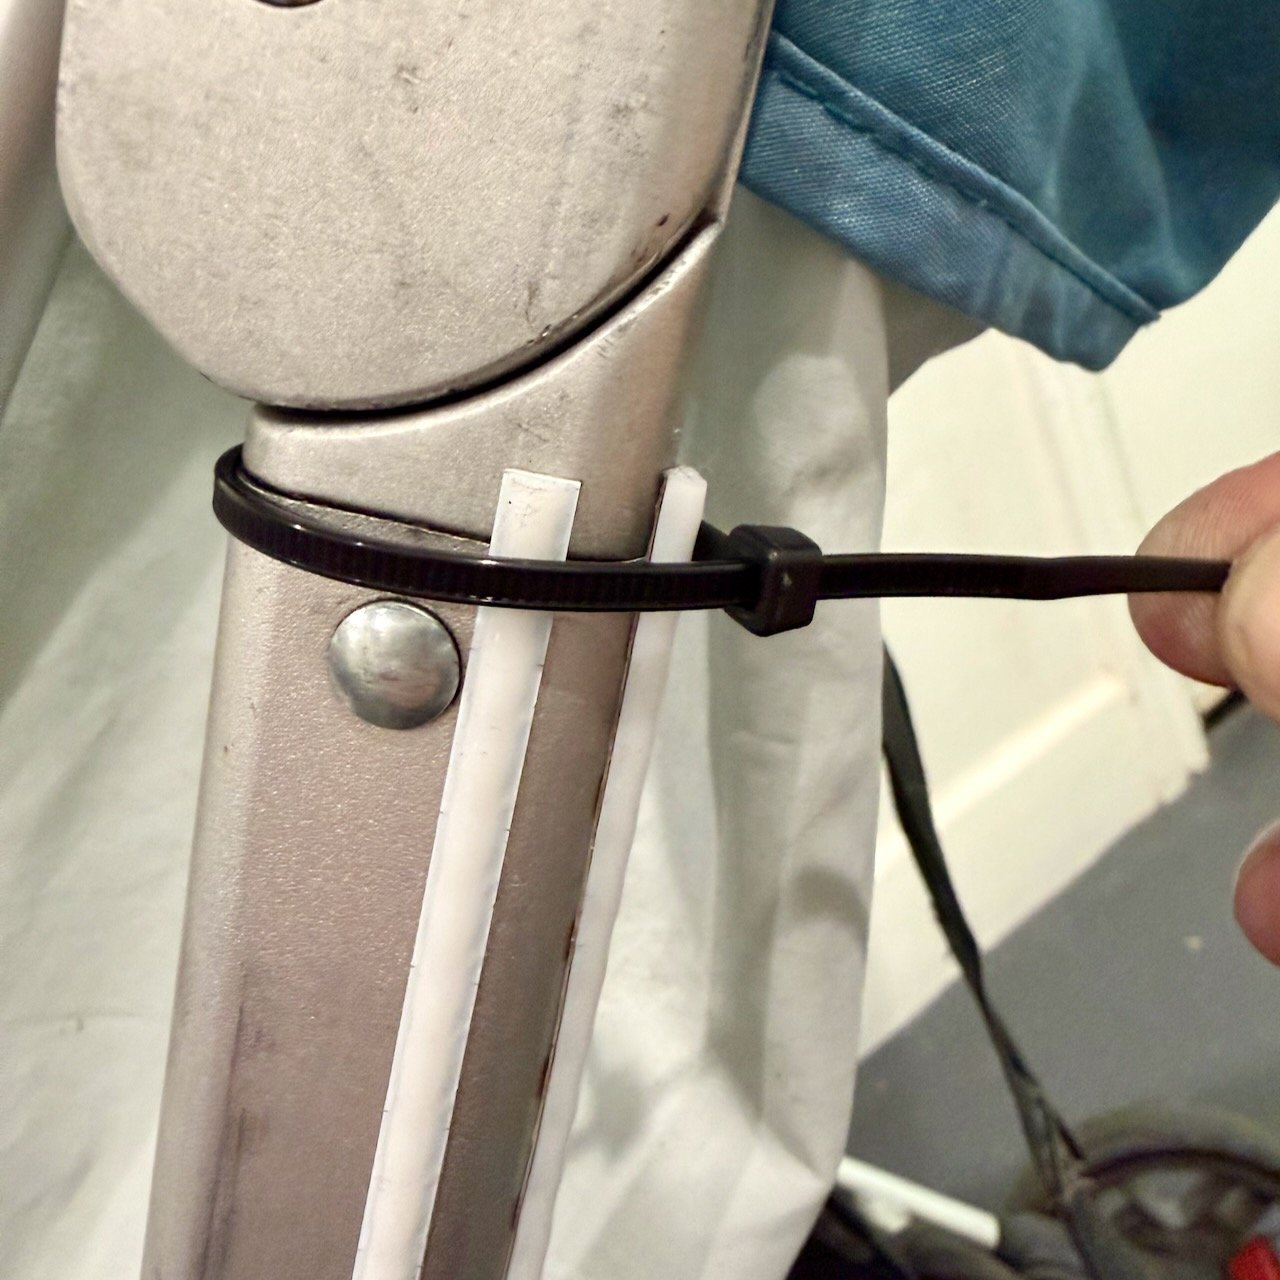
Cut the excess zip tie material for a clean finish. Wire cutters work best, but sharp scissors will also work.
Plug in the controller using the provided USB-C cable or your own USB-C power source.
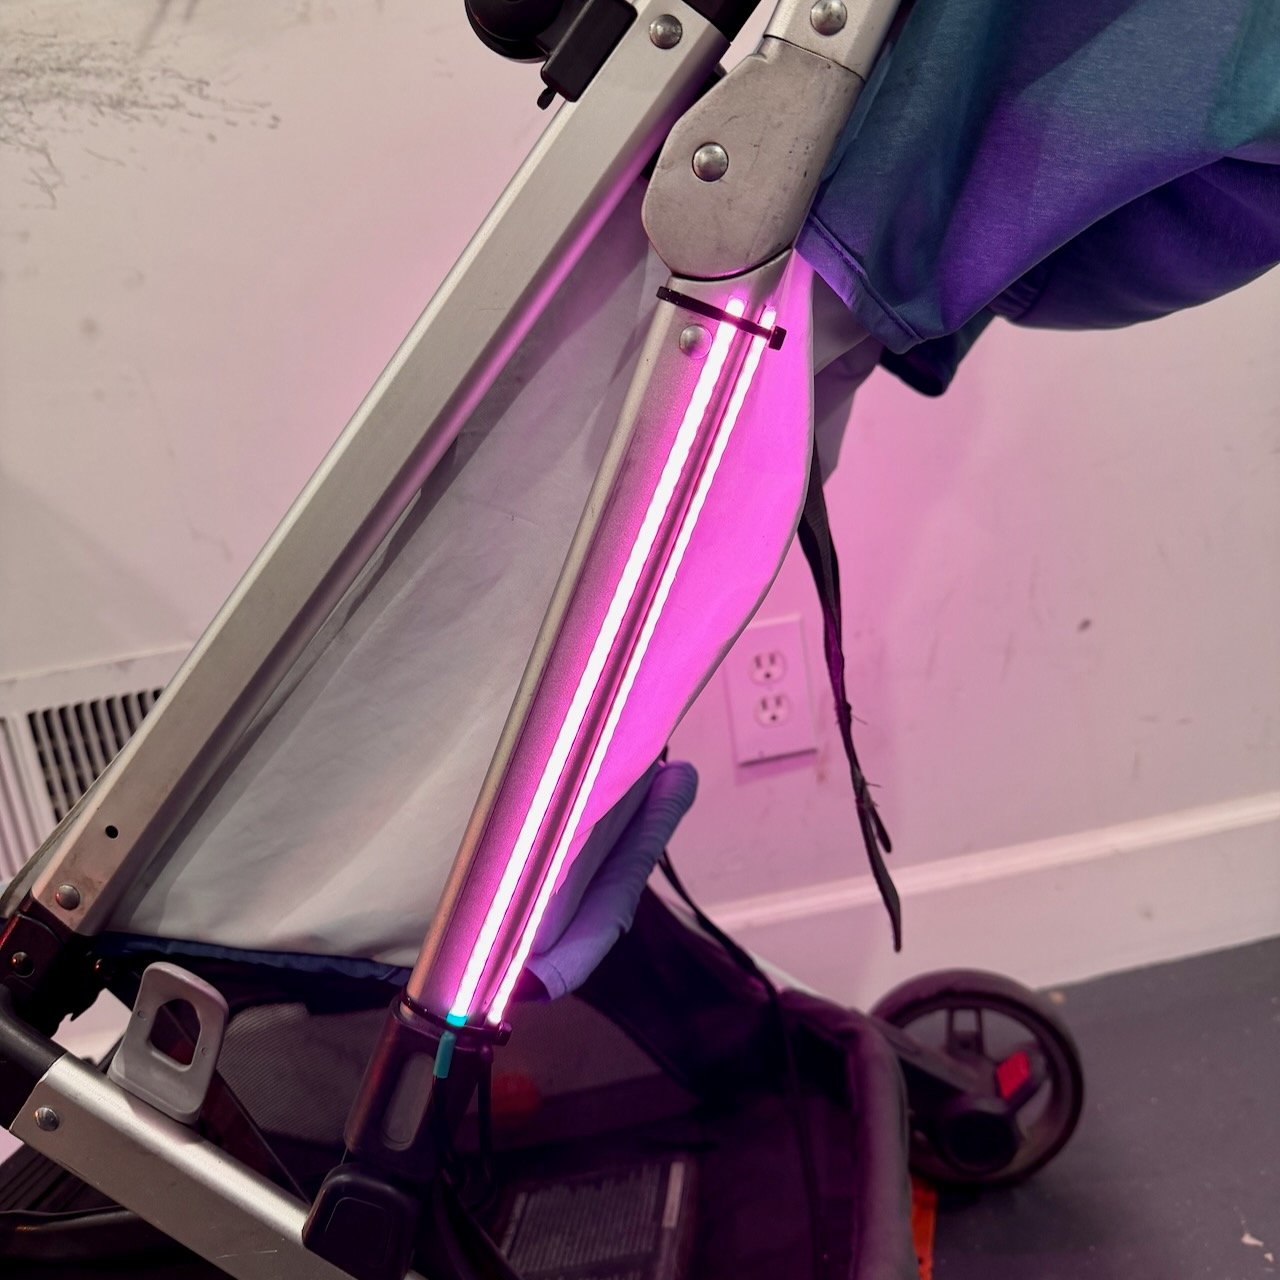
Verify that all LED strips light up. If any strip doesn't illuminate, check for any damage to the LED strips. Contact us for support.
Now let's connect to your lights and customize your settings!
Connect and SetupConnect and Setup
Connect to your Mission Bike Lights via WiFi to access the full-featured web interface for controlling patterns, brightness, and settings.
Quick Connect Options
Android & Chrome Desktop: Connect even faster via Bluetooth LE using our Web Bluetooth control page.
iOS App: Coming soon! (Just waiting on Apple.)
On your phone or computer, connect to the WiFi network named: MissionBikeLights, password: meshpassword.
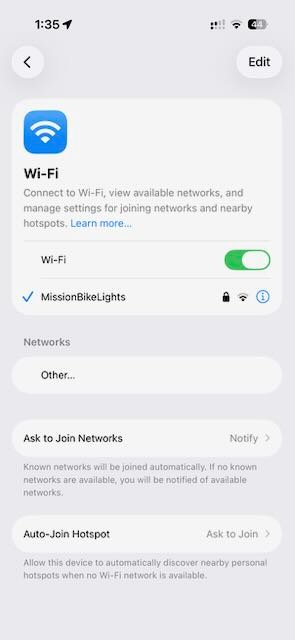
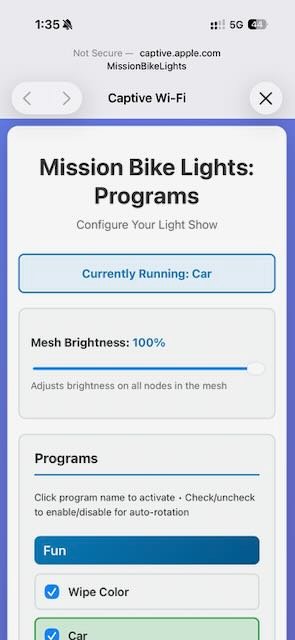
A captive portal will automatically appear, giving you quick access to the controls. This is the fastest way to change patterns and brightness!
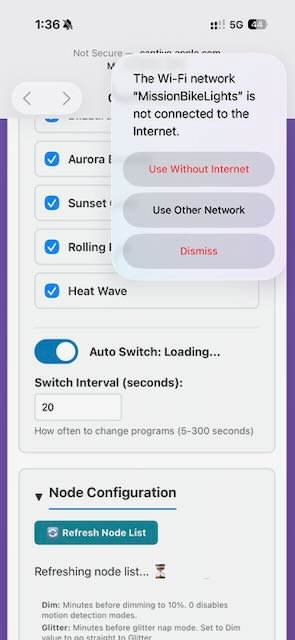
If you dismiss the captive portal, you may need to tap "Use Without Internet" to stay connected to the mesh network.
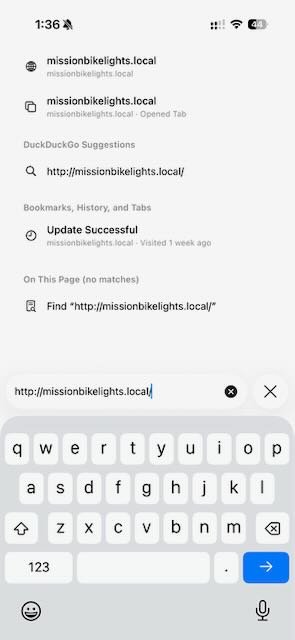
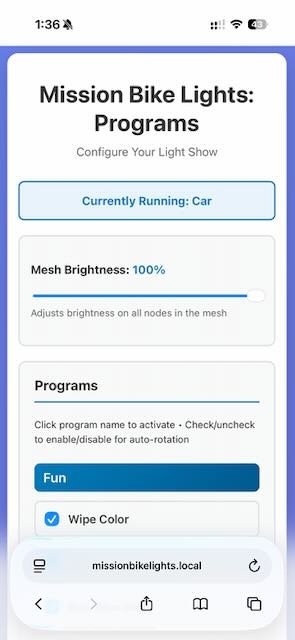
Open your browser and go to http://MissionBikeLights.local to access the full web interface. Change patterns, adjust brightness, configure settings, and more!
We're constantly improving Mission Bike Lights with new patterns and features! To get automatic updates, configure your home WiFi credentials in the Firmware Update section of the web interface.